


- 9 October 2023
DIY How to Make a Kids Easel
Unleash your child's creativity with this easy-to-make easel and chalkboard, perfect for fun-filled weekends and school holidays. With Mitre 10 by your side, you can transform your home into a creative haven, preventing your young artist from using your walls as their canvas.
Here's a detailed, step-by-step guide to help you create a sturdy, custom easel for your child.
What You'll Need
Materials
- Two 1.2m x 45mm x 19mm pieces of timber (easel legs)
- One 600mm x 45mm x 19mm piece of timber (easel top)
- One 530mm x 45mm x 19mm piece of timber (bottom support)
- One 480mm x 45mm x 19mm piece of timber (adjustable support)
- Packet of 30mm x 6 gauge Wood Screws
- Two 600 x 600mm chalkboards
- Hinges – Butt or long Piano type as preferred
- Screws – for fixing hinges
- 300-400mm Cord or Decorative Chain
Tools
DIY Project Steps
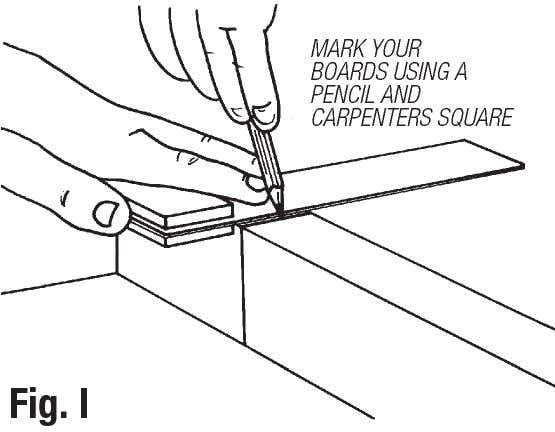
1. Gathering and Preparing Your Materials
Start by getting your materials ready. If your timber hasn't been pre-cut, take the time to measure and cut four pieces into 1100mm lengths and four pieces into 674 mm lengths.
This will serve as the legs and crossmembers of your easel. Also, don't forget to prepare two 674 mm long chalk ledges. Make sure all the ends are square for a good fit.
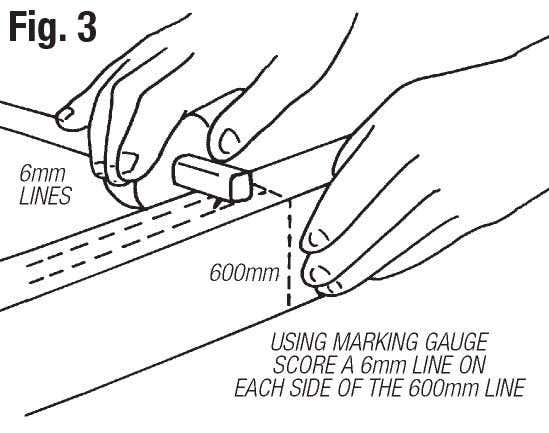
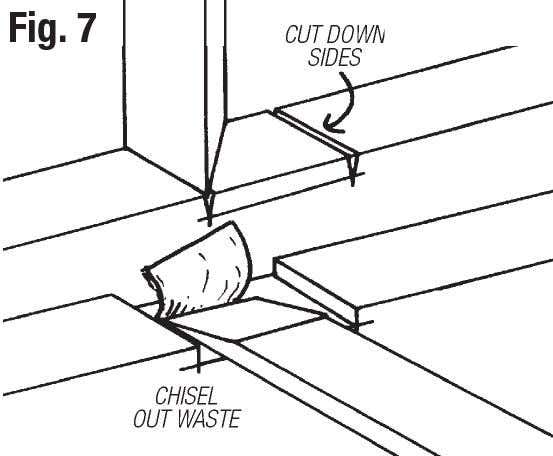
2. Rebating the Legs
Next, you're going to create a groove or rebate in the middle of each leg. This is where your blackboard will slot into.
Measure 600mm down from the top of each leg and cut a groove that's 4mm wide and 5mm deep. You can use a chisel and mallet for this step, or a router if you have one available. Secure your timber before making the cut.

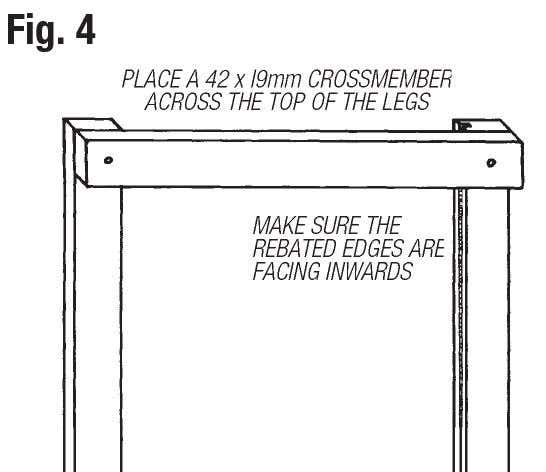
3. Assembling the Easel
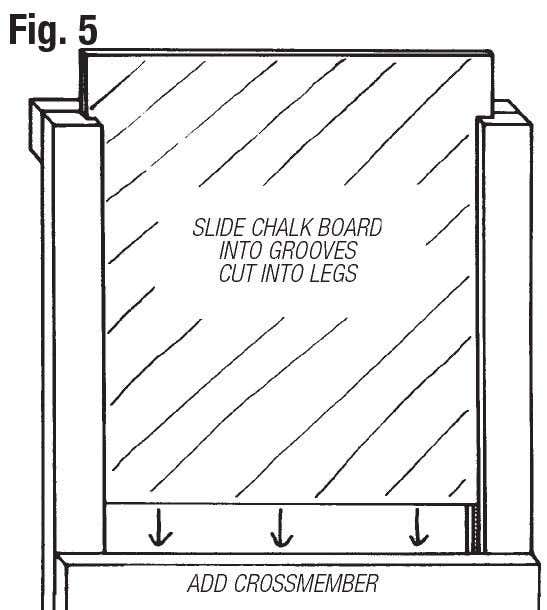
Now you're ready to put the easel together. Place one of the crossmembers across the top of two legs, and another at the 600mm mark.
Screw them in place using the 30mm x 6 gauge wood screws. Then, slide in the blackboard from the top until it fits snugly into the grooves you cut earlier. Attach the chalk ledge under the bottom crossmember. Do the same for the other side of the easel.
4. Joining the Two Sides
With the two sides of the easel completed, you can now join them together using the hinges. Mount a hinge onto each of the top crossmembers, around 100 mm from the sides. This will allow your easel to fold for easy storage.
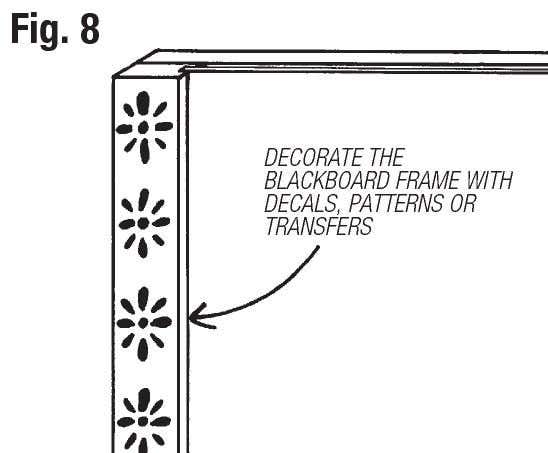
5. Adding the Final Touches
Finally, sand down the frame to get rid of any rough edges and give it a smooth finish. You can either apply a protective coating or paint it a colour of your choice. You can even decorate the frame with patterns, transfers or self-adhesive decals to add a happy note.
For added safety, attach a 300-400mm cord or a chain to the inside of the bottom crossmembers to prevent the easel from opening too wide. Now, stand back and admire your handiwork!
Remember, DIY projects like this can also be a fun activity to do with your kids. They'll love the chance to help out and learn something new. If you're looking for more DIY projects to do at home, consider checking out how to make textured wall art, how to build a cubby house, or how to build a kids play centre.