


- 5 March 2021
How to install door handles
Are you looking to change the tired or outdated door hardware fixtures in your home? A fantastic way to do that is with some brand new modern door handles from Mitre 10. Not only do we have all the items you need for your next DIY project, we also have an easy to understand set of steps to get you on your way to installing new door handles.
Now, you first need to think about which room the new door handle will be in and does it need a privacy lock? So pick your door handles with the room purpose in mind.
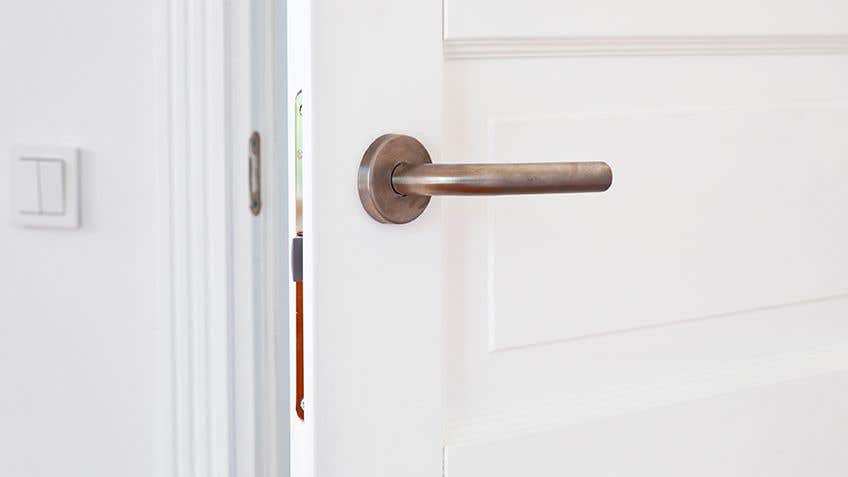
Choose your door handles
Now, you first need to think about which room the new door handles will be in. Does it need a privacy lock or easy to open and what kind of look are you going for? Whether it is modern, antique or classic you’ll need to pick your door handles with the room’s style in mind. We have door handles in a range of colours including gold, chrome, black, brass and white. If it is a new shape you’re looking for, we have traditional round knob style door handles, D-shapes, curved bow handles, lever handles and ornate wrought iron knobs.
A tradesperson is only as good as their tools, and as a home DIYer you’ll need to know exactly what you have to use to get this job done right. Enlisting the helping hand of someone more experienced could give you a better chance at success and have you not have you tearing your hair out. Replacing door handles requires the use of power tools or hand tools, and we have you covered for all of the things on this list.
Your Project Checklist
Tools
Step 1: Read instructions
Read the manufacturer's instructions on the back of the packaging. This will show you step by step how to install your chosen door handles.
Each different door handle will have varying ways to be installed.
Step 2: Mark with Pencil
Mark the latch hole and the handle hole position on the door, most locks have a template included in the pack to do this. As all good tradespeople will say ‘measure twice, cut once’.

Step 3: Drill
Drill out the handle hole with a holesaw. For a clean finish, stop drilling when you first see the pilot bit through the other side of the door. Take the bit out and drill from the other side to avoid splintering.

Step 4: Wood Cutting
Drill out for the barrel of the latch with a speedbore wood cutting bit, also known as a spadebit. Please make sure you’re wearing the correct protective wear when you use this power tool.

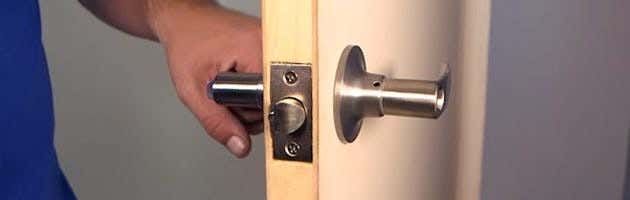
Step 5: Position Plate
Insert the latch and mark out the position of the plate. Chisel this out to the recommended depth that is on the back of the packaging. Then screw the latch into place.

Step 6: Install Handle
Install your new handles. This can be a bit tricky and fiddly, so go slowly and follow the instructions on the packaging that your new handles come in.
Step 7: Install Striker
Now that the handle and latch are fitted to the door, we can mark, drill, chisel and fit the striker plate to the door jam. Simply close the door and use the latch to determine where the hole for the striker plate needs to be positioned. Then drill the hole and mark around the striker plate with a sharp pencil and chisel the jam out. Then screw the striker plate into place.
Installing a new door handle doesn’t need to be a difficult task. If you have any further questions about this DIY project for your home then please get in touch with our team online or find your nearest Mitre 10 store today.