


- 8 September 2021
How to build a handy storage
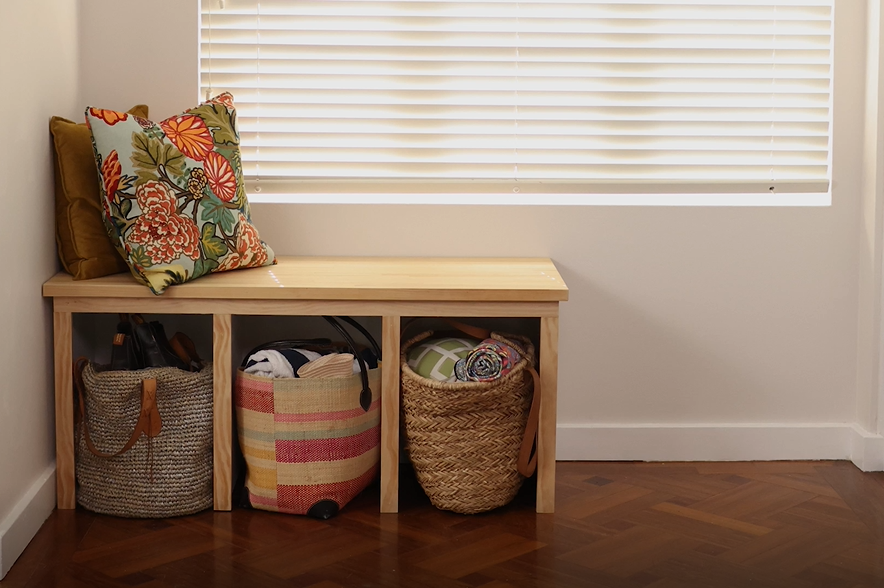
Your home’s entryway should be spotless. But tell that to the kids! And a mess of school bags, shoes and other items can really detract from your home’s look and feel. In this article, we’ll show you how to take your front hall from drab to fab with a handy storage seat that’s stylish too.
And it’s not all that hard when you get the right gear from your local Mighty Helpful Mitre 10.
Materials list
-
4 x 18mm Premium Plywood Project Panels
-
Putty
-
Pine End Capping
-
1420mm x 480mm Parquetry Bench Top
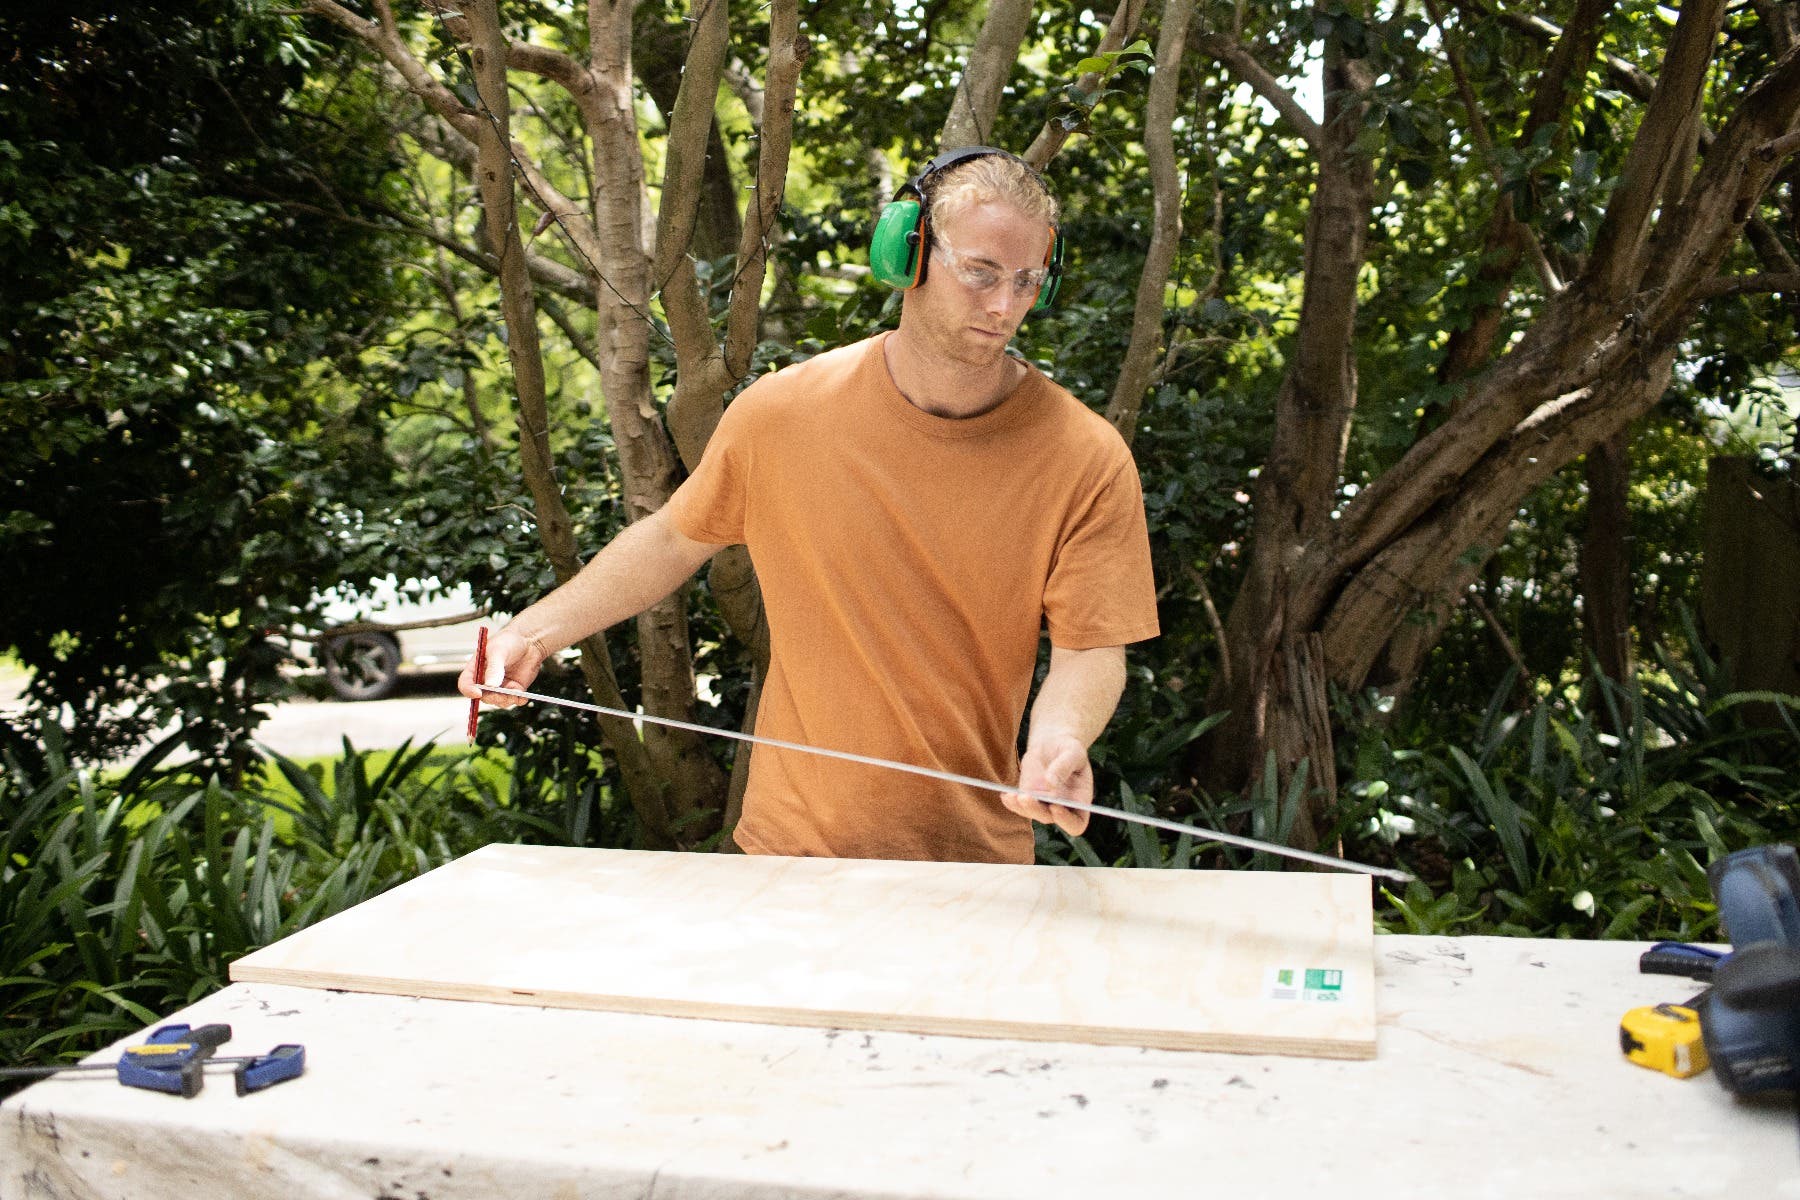
Step 1: Plan your build
Start by measuring your space and determining how large the unit will be. Keep in mind that the length of your unit will determine the number of compartments you have. An odd number always looks best, so aim for 3 or 5 compartments, each approximately 400mm wide.
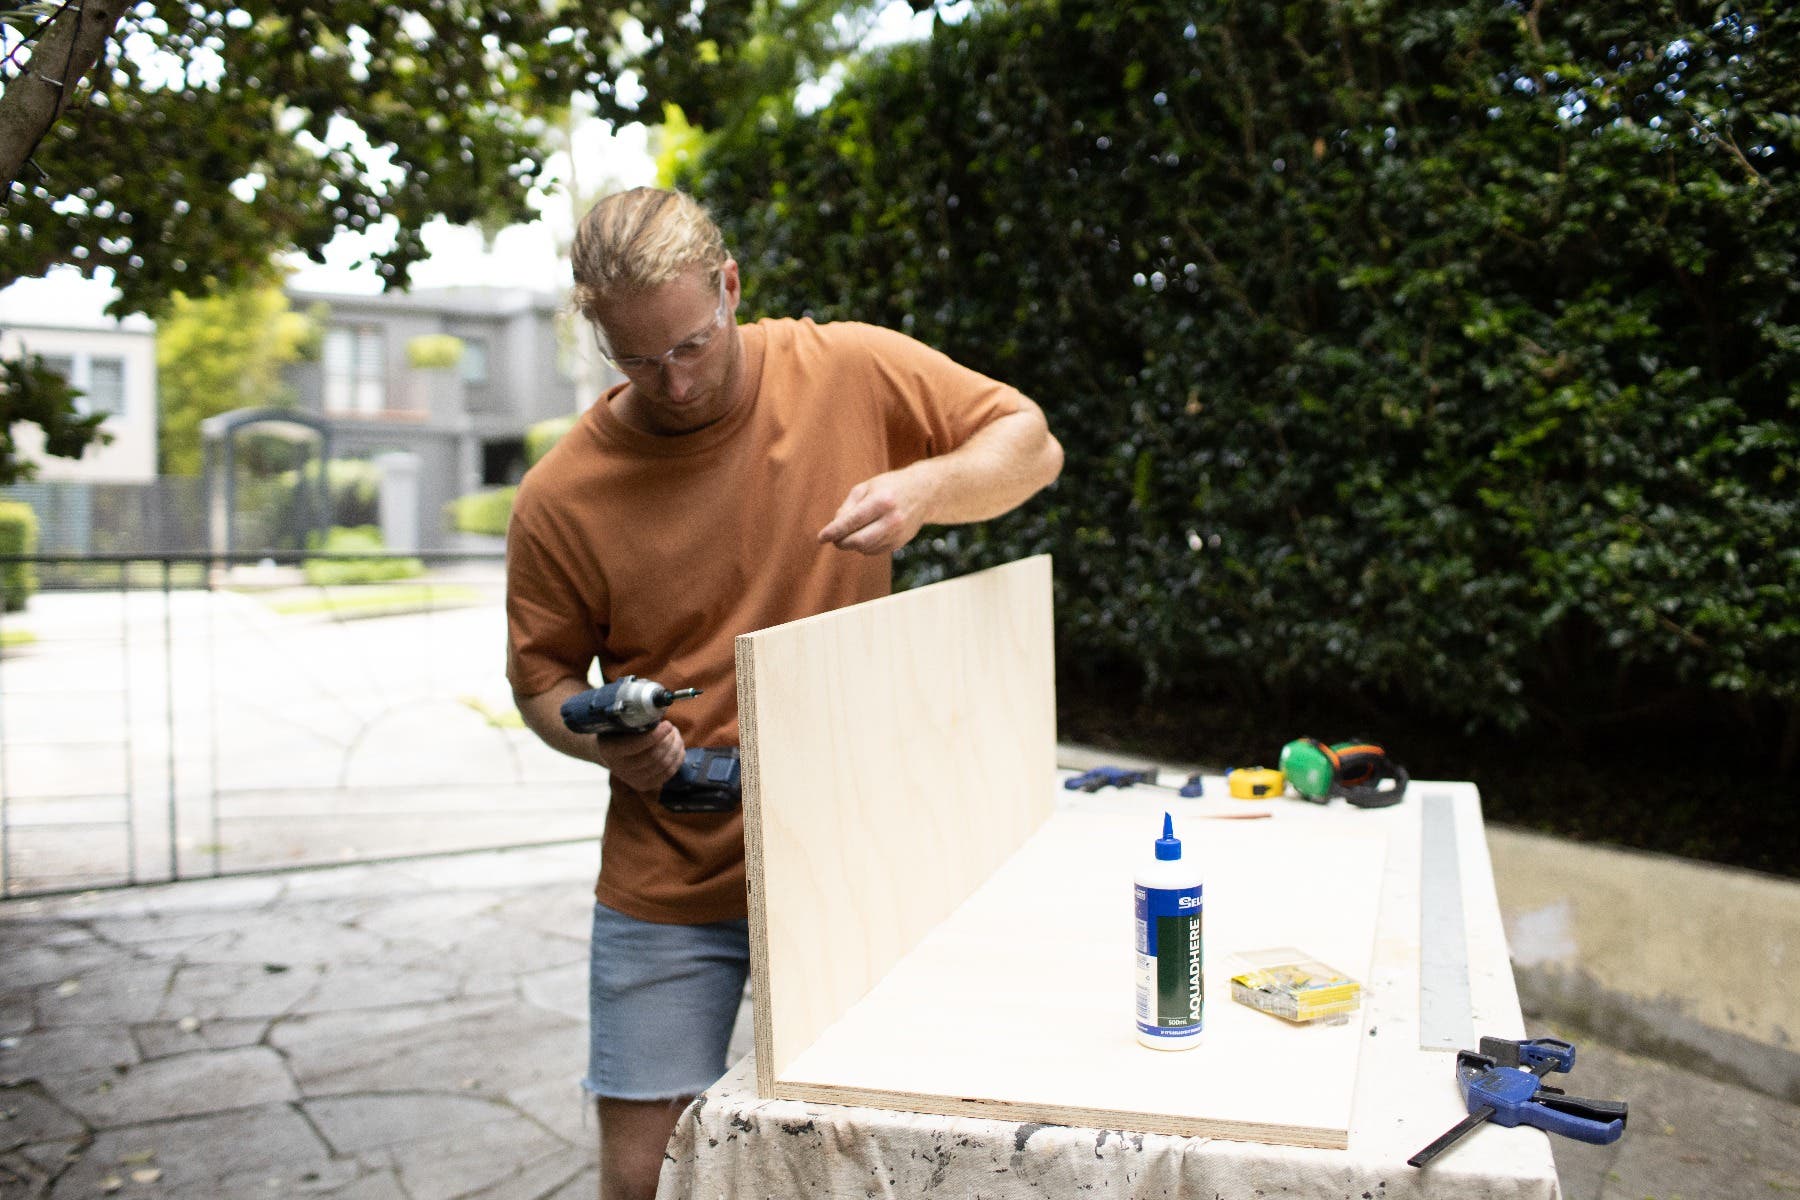
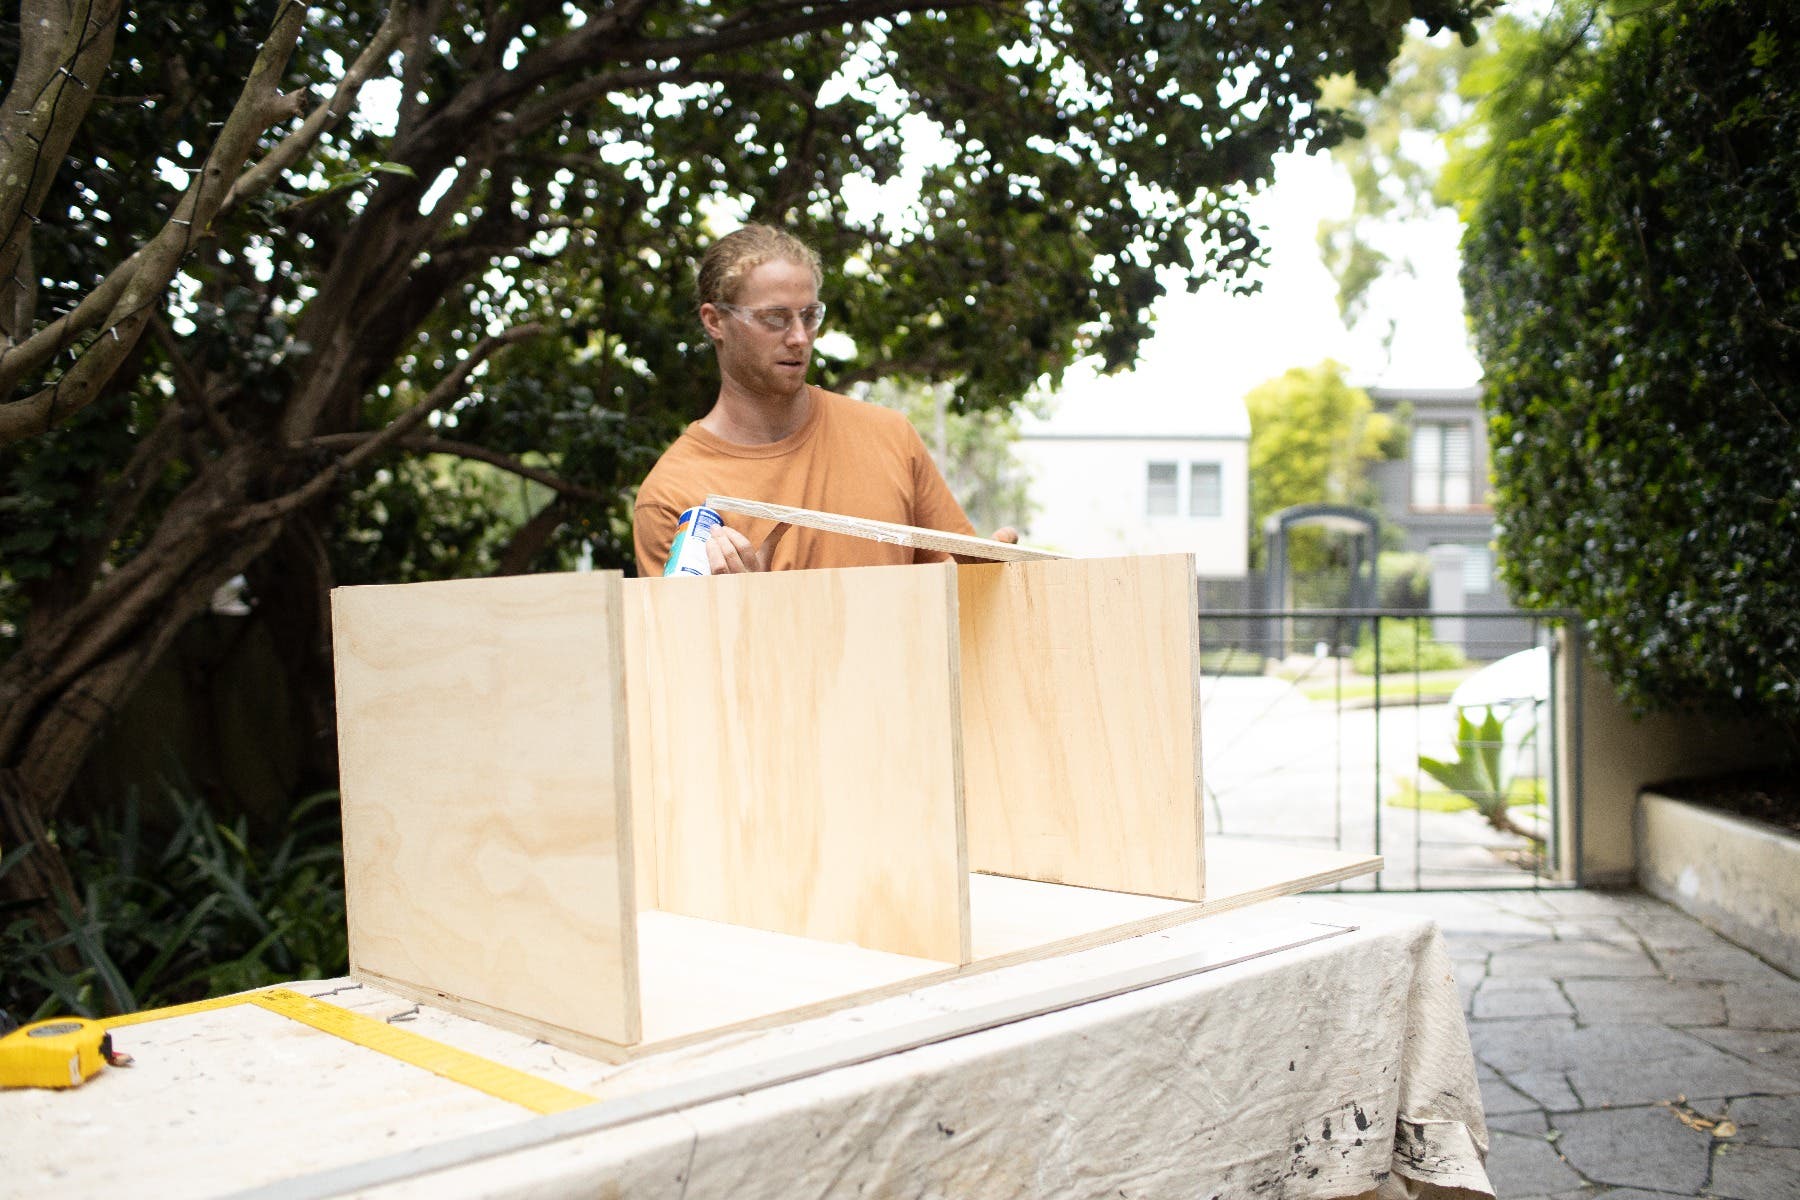
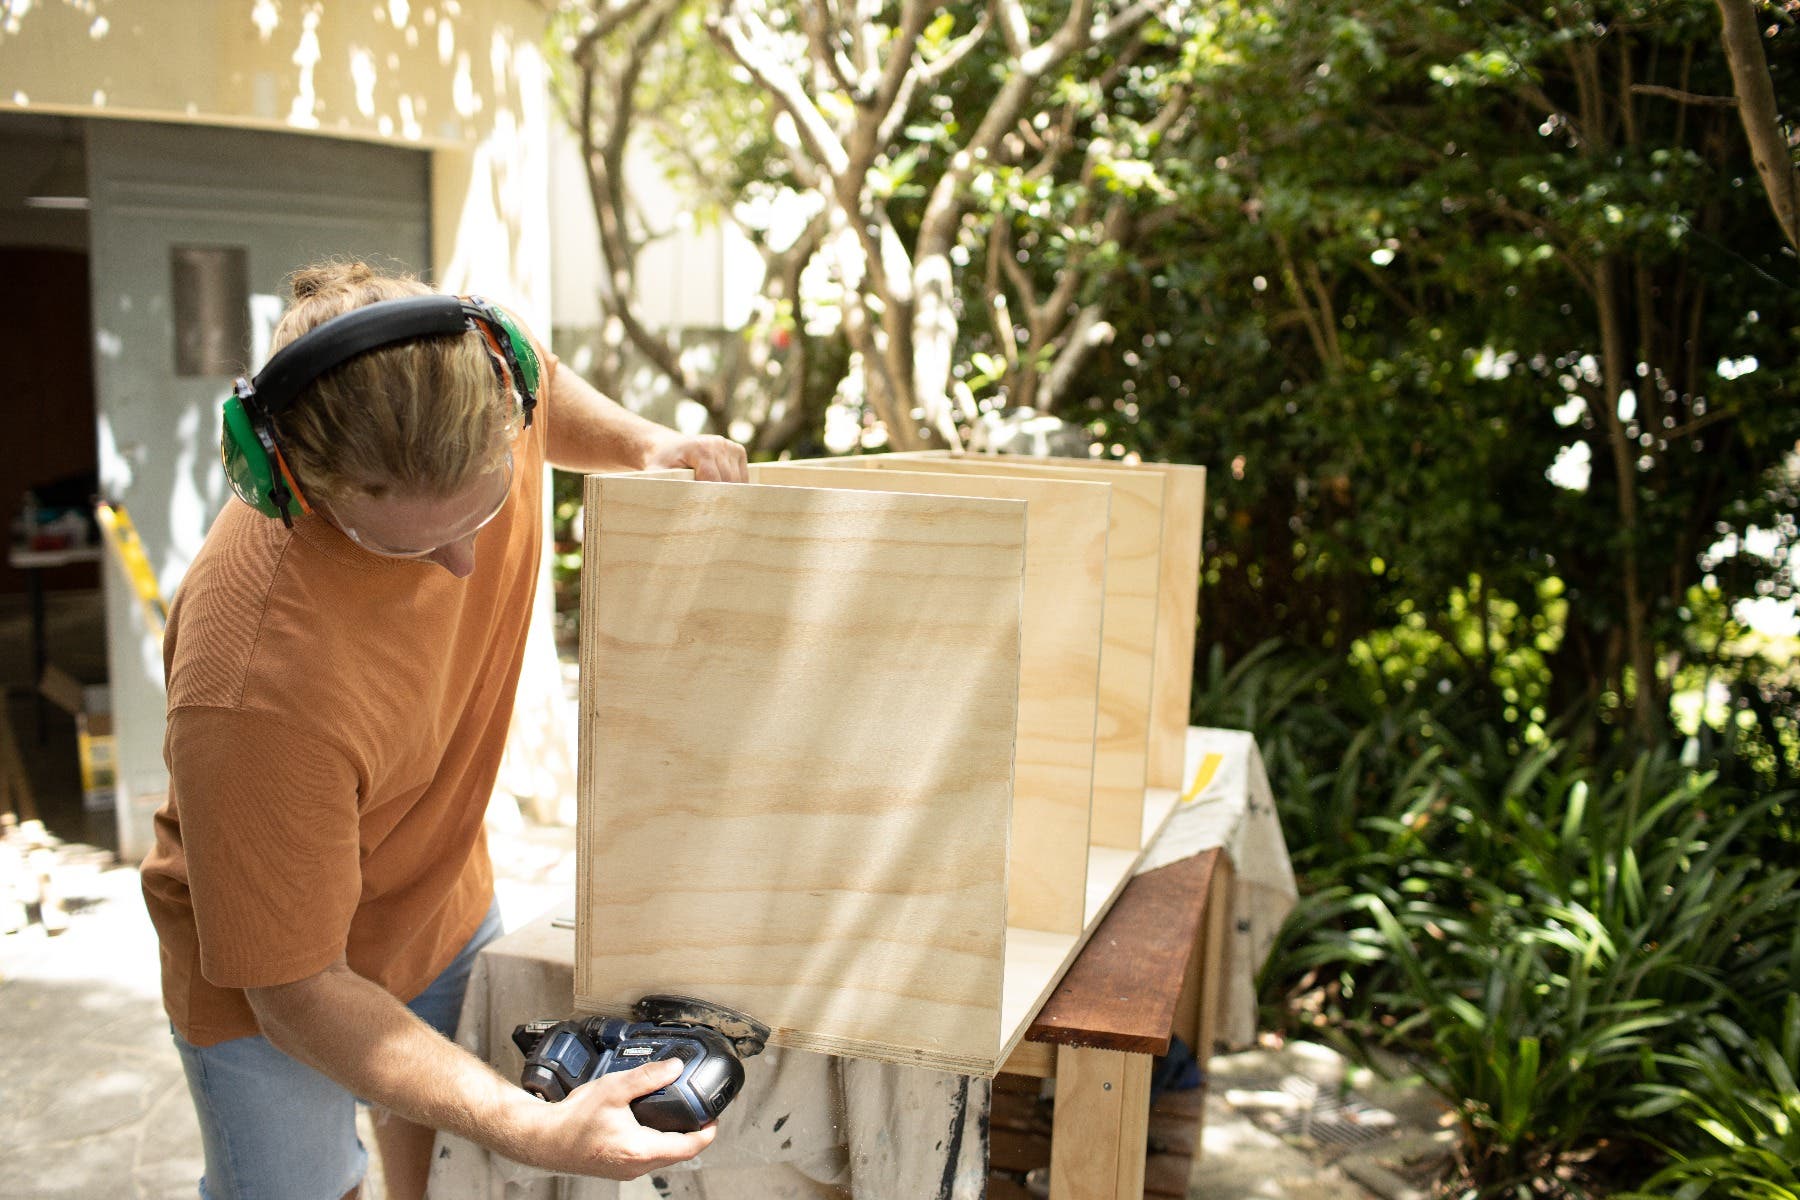
Step 2: Cut and assemble
Cut your plywood project panels to size to create a back piece and a top piece. Use your own predetermined length, a seat height of 500mm and a depth of 400mm.
Join these two pieces into an L-shape and glue and screw them together using Aquadhere wood glue and 8 x 40mm screws, evenly spaced.
Cut four smaller pieces the depth and height of the interior of the unit. These will make the storage compartments. Glue and screw them into the top and back of the frame using Aquadhere wood glue and 6 x 40mm screws per panel (3 screws per side), evenly spaced.


Step 3: Paint and add pine end capping
Give your unit a light sand using your Rockwall Sander and sandpaper to remove any rough edges. Paint it your desired colour, or leave it natural if preferred.
Finish off your raw edges with pine end capping. Cut your first piece the length of the top edge and attach it with Aquadhere wood glue and 4 x 40mm x 1.6mm Bullet Head Nails, evenly spaced.
Cut four more pieces the height of your compartment dividers (minus the capping applied above). Attach these with Aquadhere wood glue and 2 x 40mm x 1.6mm Bullet Head Nails per compartment, evenly spaced.
Lightly tap in your nails with a punch and a hammer so they’re not protruding, and fill any gaps with wood putty.
Step 4: Attach the seat pad
Finish off the storage seat by adding a pine parquetry seat pad. Cut your timber to size using a circular saw. Ensure there is a 20mm overhang on each side of the unit, so the pine end capping is covered, and so the unit neatly meets the wall.
Attach your seat pad to the unit using Aquadhere wood glue and 6 x 30mm screws, attached from the underside so the seat pad remains unblemished.
Step 5: Protect your timber with wood oil
Protect your seat pad and preserve the warm timber tones by coating the parquetry timber and pine end capping with Organoil Wax & Polish.
For more Mighty Helpful service and advice, speak to the team at your local Mighty Helpful Mitre 10.


