


- 10 March 2021
Renew your deck furniture
Uncover hidden character in your home
TIme ages and greys timber also. By its very nature timer is a continually changing structure. Due to its cellular makeup, timber constantly reacts to the environment it is in.
Your Materials Checklist
- Fine, medium & course sandpaper
- 50mm galvanized deck nails, galvanized wood screws as necessary
- Timber restorer (pre-stain treatment)
- Selected timber finish
- Filler
- Clean up rags
- Solvent (as necessary to clean brushes/surfaces)
- Exterior water resistant wood glue
Maintain
To maintain a selected timber finish and colour in outdoor situations regular maintenance is a requirement. And if your deck or outdoor furniture are beginning to show age then take heart for todays technology has brought forward products to assist in easy restoration of your favourite outdoor piece. Your first task is to get organized, so before commencing we suggest you read this MitrePlan, inspect carefully the nature and extent of the work and settle on the desired outcome and finish for the task.
Step 1: Job inspection
Firstly it is best to determine the species of timber you are working with for staining/finishing purposes and also where any timber replacement is needed. You have a wide choice of products to choose from, and in that also either water based finishes or oil based finishes. From within this selection there are basicly three types of finish you can use:
Full cover: finish A stain much like paint which is not transparent through to the grain. Easy to use, as after initial timber clean and preparation, cover is done in 2 or 3 coats. Water based and low sheen it is suitable for decking and furniture, and provides full timber protection.
Exterior stain: A see through stain which enhances the natural colour and grain of the timber. Preparation is important as this will be reflected in the completed job. It is usually an oil based product. Clean up with mineral turps.
Exterior clear: A clear oil finish which highlights the natural colour and finish of the timber. Preparation is also very important, and clean up is with mineral turps. There are also acrylic clear finishes which have water clean up, these perform very well.
Step 2: Maintenance work
Inspect the decking for signs of deterioration such as splitting or rot, loose boards and damage to other framework areas beneath the deck. Where necessary remove the offending timber and replace it with the same timber species. A common maintenance item on decking is protruding nail heads and loose boards. This is often caused by shrinkage of the framing timber over a period of time – all that is needed is to knock the nails down into the timber with your hammer and nail punch to a nominal 2-3mm below the surface (Fig. 1).
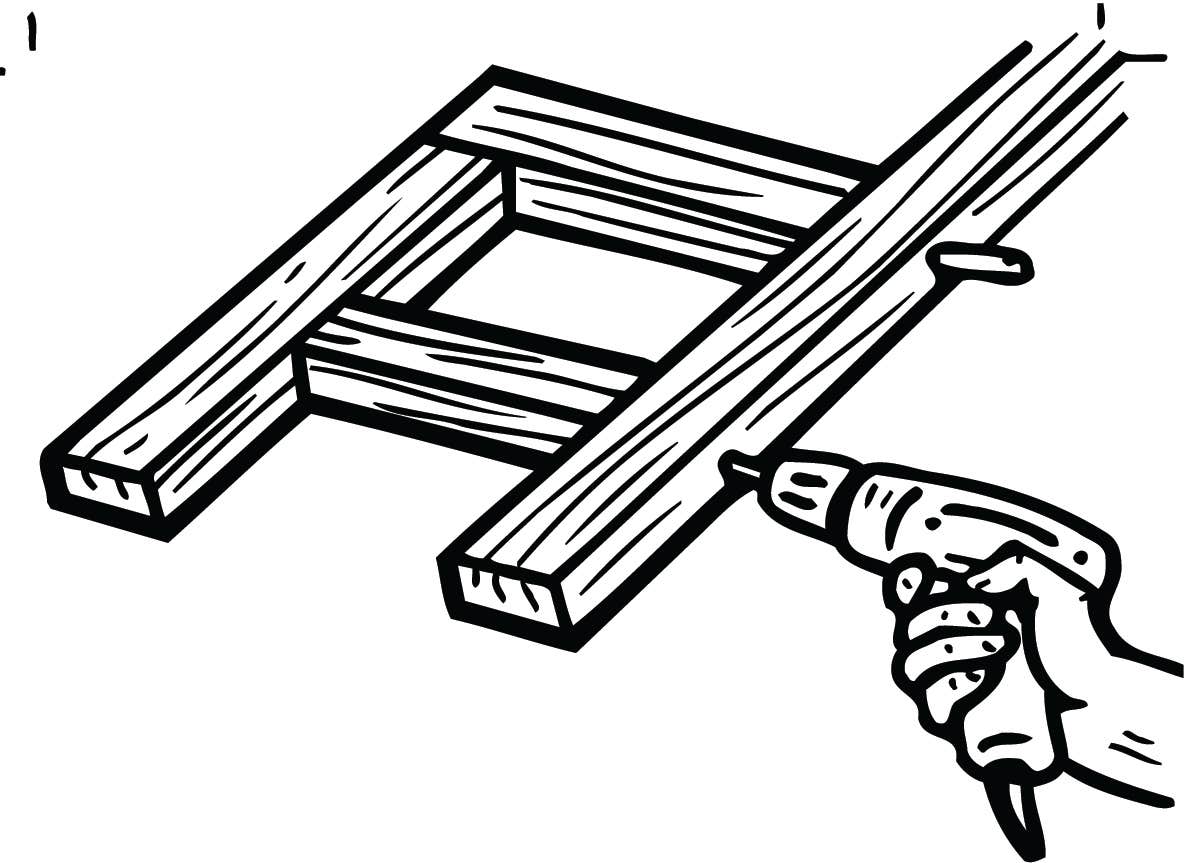
Outdoor furniture Inspect joints for rigidity and the method of joint construction. If the join is held together with screws or a bolt system then simple tightening may be all that is needed, or replacement of a screw with a longer and thicker screw. Be sure to pre-drill holes before inserting the screw to prevent splitting of the timber. Look at the end grain, particularly the bottom of the legs where moisture can cause problems. If rot has started it could be simply a matter of cutting some length off the leg to solid timber. Once this has been done you may want to cut all furniture legs so the heights are constant (Fig. 2). Where the joins are very loose and a screw is unlikely to hold them – and the end grain of the timber is sound – then some re-building may be necessary. Dismantle the furniture, clean all joining ends and sides and reassemble with the aid of 10mm dowell and water resistant wood glue (Fig. 3). Locate the dismantled members in position to each other on a flat work surface, drill a 10mm hole through one side member into the joining piece. Spread a liberal amount of glue on the join and into the drilled holes, push the dowel into the timber members, cut off to length and clamp the furniture until the glue is set.
Fig. 1

Fig. 2
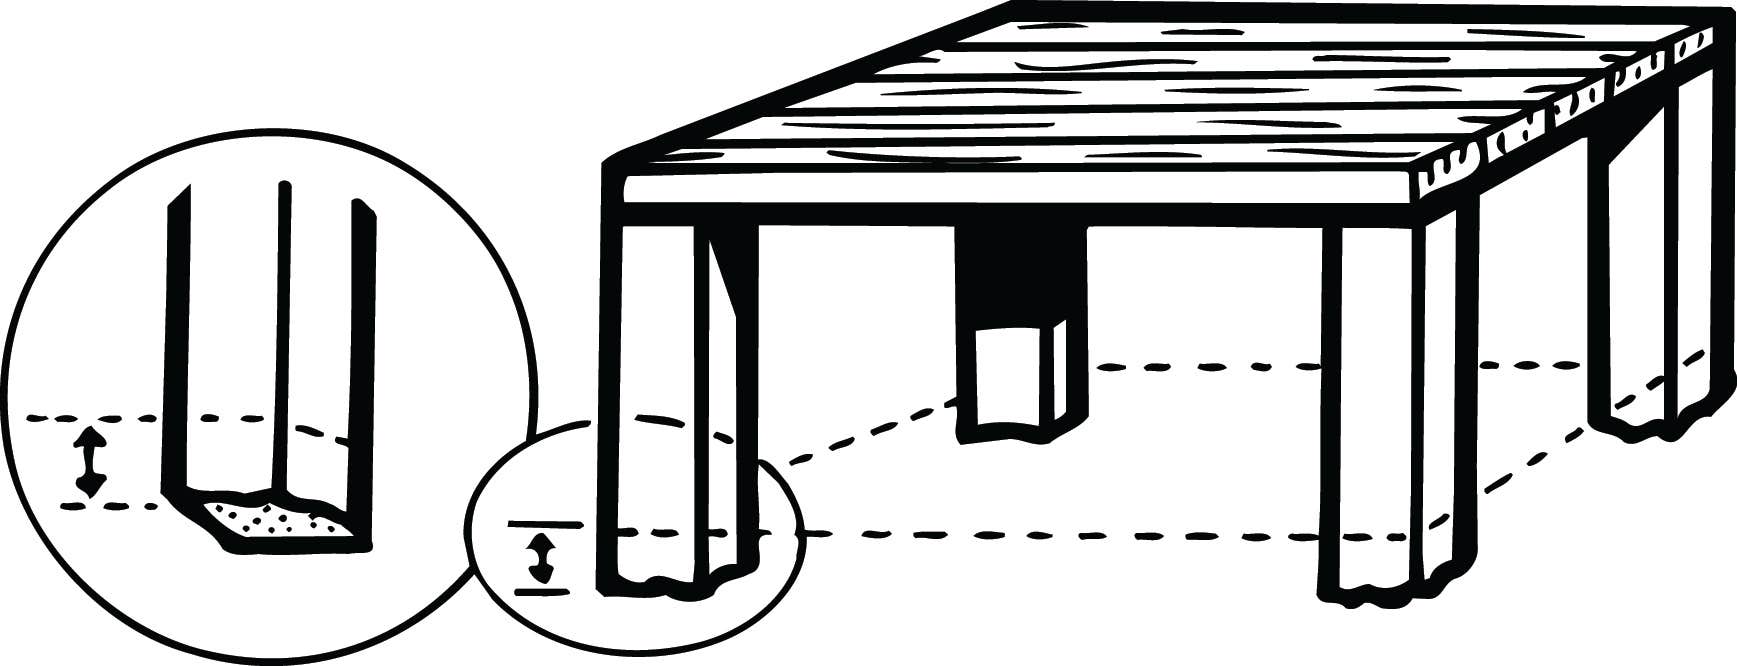
Fig. 3
Step 3: Preparation
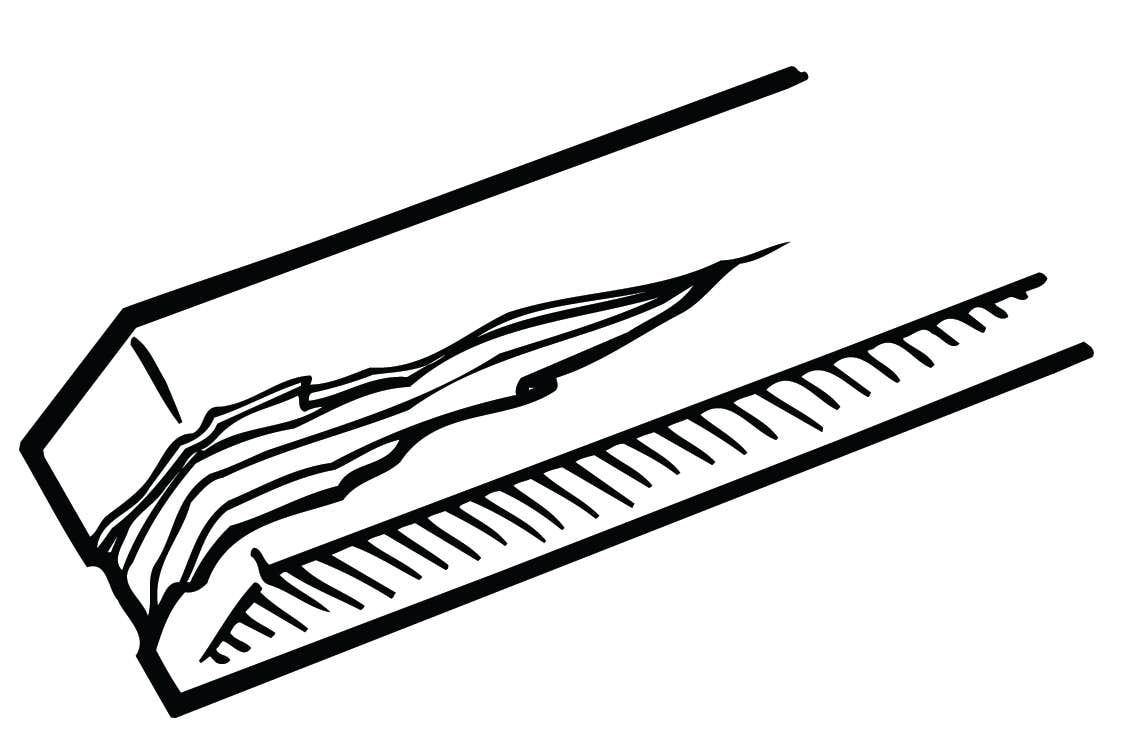
Preparation can be undertaken in several ways. Where a stained or clear finish is required one of the following steps should be undertaken. The surfaces can be sanded clean to reveal the hidden natural colour of the timber – this method is necessary where a finish has been applied previously. This is accomplished either by hand with sandpaper and a sanding block or with the aid of a sanding machine. By dampening the surface to be worked on with water prior to sanding the grain will be lifted, which will assist a smoother surface after sanding. On large deck areas the use of a drum sander will be of great assistance. Some Mitre 10 stores will have drum sanders available for hire, otherwise, they are available at most tool hire shops (Fig. 4). Any grease spots can be removed with the aid of mineral turps. On timber which is weathered which has had no added finishes to it use a proprietry outdoor timber cleaner which restores greyed timber back to its initial natural colour, and will remove mould and algae buildup. For paint or solid colour finishes on previously painted surfaces remove any loose or flaking paint using sand paper and a scraper. Where paint is holding well to the timber sanding over to break the surface for the new paint adhesion is necessary. In areas you may come upon spots that have paint and bared timber, this will show a step or ridge at the edge of the paint. Feather off this edge with sandpaper so that the defect will not show through on your finish coat of paint (Fig. 5).
Fig. 4
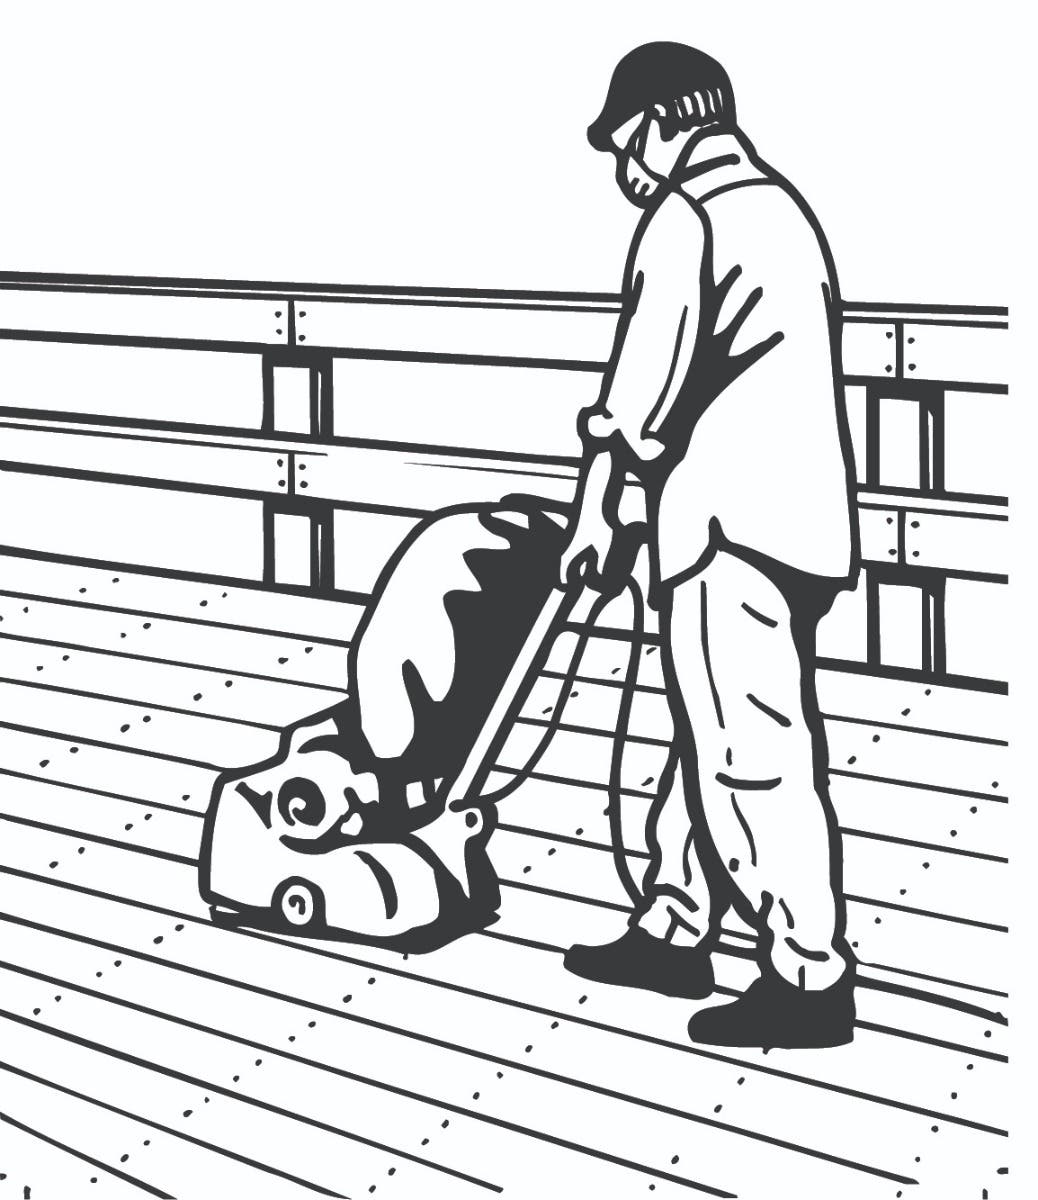
Fig. 5
Step 4: Applying the finish
Go shopping and familiarize yourself with the various finishes available, and also the manufacturers particular instructions for the task you are undertaking. Your local Mitre 10 store has experts on hand to assist you here. For furniture it is best to use a brush or spray gun for application. Thoroughly wipe down the furniture and remove all dust particles. Select a nice shady spot as direct sun may cause the finish to dry prematurely, especially if it is full colour. Two coats minimum are recommended, with a light sand in between coats. Sandpaper used for this finish work should be a fine grit of 180 grade, sand with the direction of the grain and be sure to have allowed enough time for the applied finish to dry between coats. Decking can be finished by using a paintbrush, roller or lambswool applicator. Prior to commencing sweep down the surface and remove all foreign particles and dust, apply the surface finish only on a still day and preferably not in the heat of the day. Ideally the weather would be relatively cool and free of harsh sun.
Step 5: Maintenance
It is a fact that any timber exposed to the elements, especially as harsh as we experience in Australia, is going to need a certain amount of upkeep to maintain colour and finish. Where clear finishes or stains have been used this could mean that each year or so, give a quick ‘dust over’ with fine sandpaper to provide a key for another coat or two of stain. Naturally remove flakey or cracked varnish and sand down in the area prior to application. Also keep all surfaces clean by washing down regularly with warm soapy water.


