- 10 March 2021
Add privacy and charm with lattice
Lattice is back in fashion again because of the great results you can acheive with it and because it is so simple to erect. Today, home owners are finding new and exciting uses for this multipurpose product to decorate their gardens and homes.
Your Materials Checklist
- Posts: 3 – 100 x 100mm x 2400mm long
- Rails: 3 – 100 x 50mm x 2400mm long
- Lattice: 2 sheets per panel 900mm wide x 2400mm long
- Joists: Unseasoned Hardwood or Treated Radiata Pine 100 x 50mm
- Galvanised Nails: 75 x 3.75mm bullet head for rails 50 x 2.8mm flat head for lattice
- Dry Cement
- Stakes
- 50 x 25mm timber bracing
- Timber post hole sole plates (or concrete if desired)
Let’s look at lattice
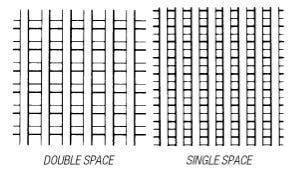
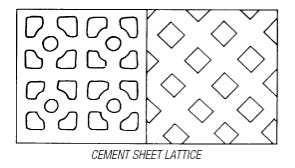
Lattice today is predominantly made from treated pine, and available in a wide range of pre-made panel sizes. Lattice can also be made to order, but remember to give Mitre 10 at least two weeks lead time on your order. It is perfect for outdoor use as it is very durable, resisting decay, termites and fungi. It also requires no protective painting or staining unless you want it to match some existing feature of your garden or home. The greenish colour of treated pine blends well with the natural earthy colours of plants, woodwork, bricks and paving. Hardwood and Western Red Cedar lattice panels are also available for outdoor use. Cedar lattice can be used with stunning effect indoors too, as a room divider or as a decorative feature. For real do-it-yourself enthusiasts, Cedar lattice components can be purchased separately allowing special screen sizes to be easily made up at home. Lattice also comes in fibre cement sheets which offer all the design attributes of traditional timber lattice plus a few of its own. For example, it is made flat and can be painted easily and quickly by roller rather than brush to save you time. But be careful, as Fibre Cement Lattice is prone to cracking easily. Generally, timber lattice comes in two main patterns – square (which is the most popular today) and diagonal, with either a single space or double space grid in the lattice framework (Fig. 1). If you want something less traditional, cement sheet lattice may be the answer (fig. 2).
Step 1: Getting started
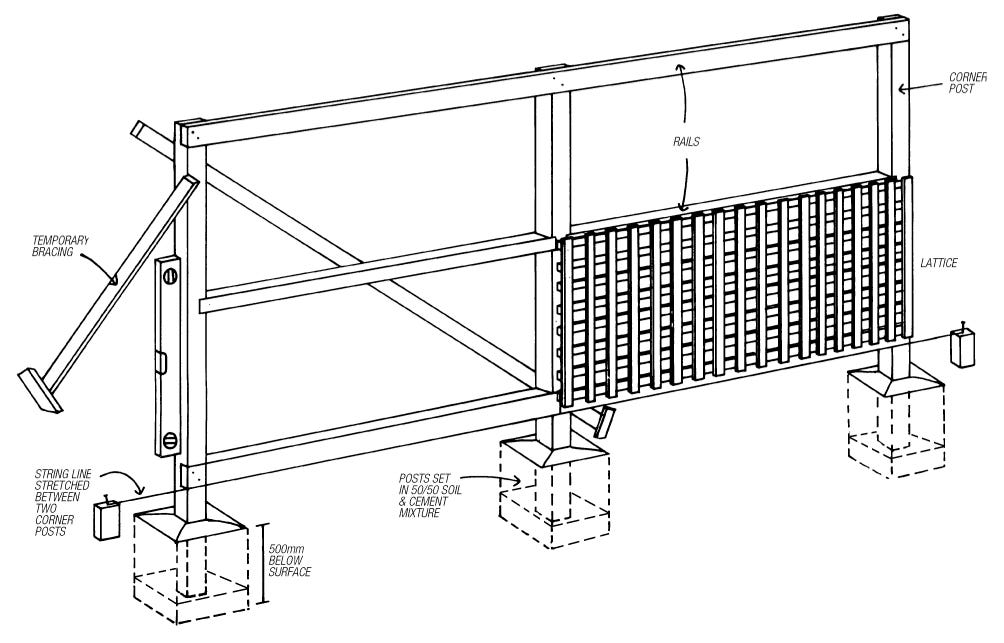
Your first job is to mark the line of the wall and to make sure all posts will be set in a straight line. To do this, mark both corner posts first. Drive in a stake at one end post position and run a stringline the full length of the wall. Drive in a second stake marking the opposite end post position. Then measure and stake all intermediary posts, remembering to allow for the 2.4m lengths of lattice. Dig the post holes approximately 500mm deep x 300mm square. To make your job easier, consider hiring an auger-type post hole digger.
Step 2: Cutting the rail notches
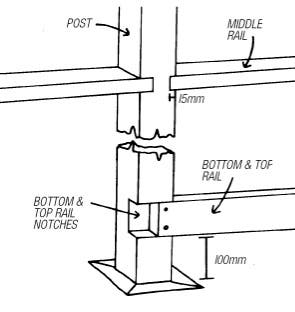
Next job is to notch the posts for the cross rails before setting them in the ground. The top rail is set flush with the top of the post. The bottom rail is set approximately 100mm above the ground. When measuring, be sure to allow for the part that goes in the ground, around 500mm. The middle rail is spaced between them, allowing for the 900mm widths of lattice. The top and bottom rail notches are made by sawing to the thickness of the rail and chiselling out the excess (Fig. 3). They should not be deeper than the thickness of the rails to provide for a flush fit. The middle rail post notches are made by sawing and chiselling to the width of the rail and set 15mm deep on the inside of each corner post and on both sides of any post in between (Fig. 3).
Step 3: Setting the posts
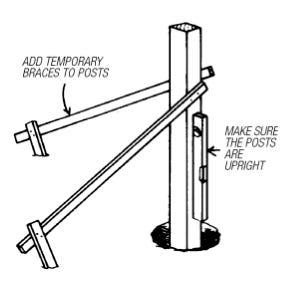
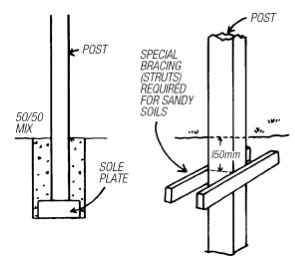
First, place a timber soleplate in the bottom of each hole and stand the post on it. Or use a 50mm thickness of concrete instead of the timber soleplate. Next, stretch a string line between the two corner posts to align one side of the posts. Fix the string line to the height on the bottom rail notch (Fig. 4). Use your spirit level to make sure the line is level along the entire length of the wall. If the ground is a bit uneven, you may have to adjust a post by either digging the hole slightly deeper of filling in to ensure the bottom of the notch is level with the string line and the other posts. The lattice is nailed flush with the bottom of the rail and if it’s not straight, your lattice could end up crooked. You’ll need to brace each post temporarily with the 50 x 25mm battens so they stay upright and straight (Fig. 5). Where posts are to be set in sandy soil, special post struts may be required (Fig. 6). Fill the holes completely with a 50/50 mixture of soil and dry cement. Check the post is truly vertical with your spirit level, adjusting the post braces as necessary. Then tamp down the mixture hard to firm it. Slope the top of the mixture away from the post above the ground to allow rain to run off. Finally, add water to set the cement in the soil and leave overnight.
Step 4: Completing the job
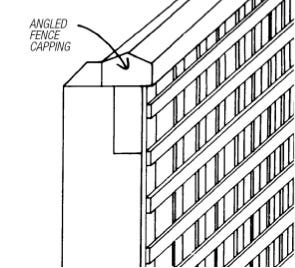
Next day, cut and fix the rails in the post notches using 75 x 3.75mm galvanised bullet head nails. Leave the braces in position to stiffen the post for nailing. Joins in the rails should be butted together in the middle of the post and no two rail joins should happen in the same post if you can avoid it. Attach the lattice with 50 x 2.8mm galvanised flat head nails, checking the midrail for straightness while nailing. You might also like to consider adding a capping to your new lattice wall to give it a more professional overall effect (Fig. 7). In this case, choose an angled capping that will shed water, and fix it using one galvanised nail every 600mm., driving the nail at least 35mm into the rail.
Let loose with lattice
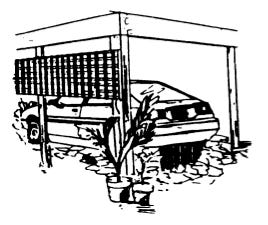
There are literally hundreds of ways that lattice can be used creatively to add privacy and charm to your garden and home. Use it as an attractive screen on top of a paling fence to provide additional privacy as well as a perfect place for creepers to grow. Simply fix 90 x 35mm uprights to the rails on either side of the fence and nail the lattice panels to them. Just picture a handsome arbor as a focal point in your garden landscape – perfect for a climbing rose vine. It’s sturdy and a breeze to put up. Or how about a quick, easy-to-make lattice shelving unit. Cut the uprights from a panel of lattice, nail or screw battens at the top and bottom to hold them together and add some ready made shelving. If you need an occasional screen, just join several panels of lattice together with hinges and you have an easy and attractive portable Chinese garden screen to add privacy, hide unsightly areas, or stop straying pets. Lattice is the perfect answer for garden screens and dividers, or attaching to walls for climbing plants. You can use it to provide shade on an exposed verandah or patio, or to enclose a fernery. Where too much sunshine comes into the house, add some lattice to the eaves to help screen it out. Use it to screen a carport, to hide caravans, trailers and boats from public view, or to screen utility areas from entertainment areas. In fact, the uses of lattice today seems only limited by your imagination. So go to it – and you’ll enjoy your house and garden even more.
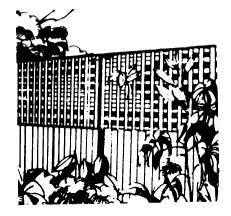
Pailing Fence
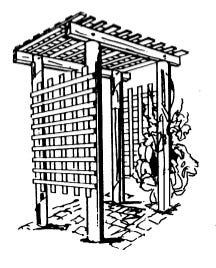
Rose Arbour
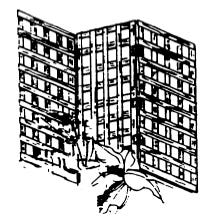
Portable Screen
Carport Screen