- 1 November 2023
Creating a house number planter is a wonderful way to add a personalized touch to your home's exterior. Here's a step-by-step guide on how to make one:


DIY Project Steps

1. Grab materials from local Mitre 10
Grab your materials from your local mitre 10 and have your timber cut to size by one of our friendly Team Members in-store.
We’ve gone with 290mm x 19mm pine at 400mm long for the back and 90mm x 19mm at 100mm for the sides and 350mm for the bottom and front to create the box, but you can go with whatever size you like; you can use different lengths and widths, so you have variation in size of your planter.
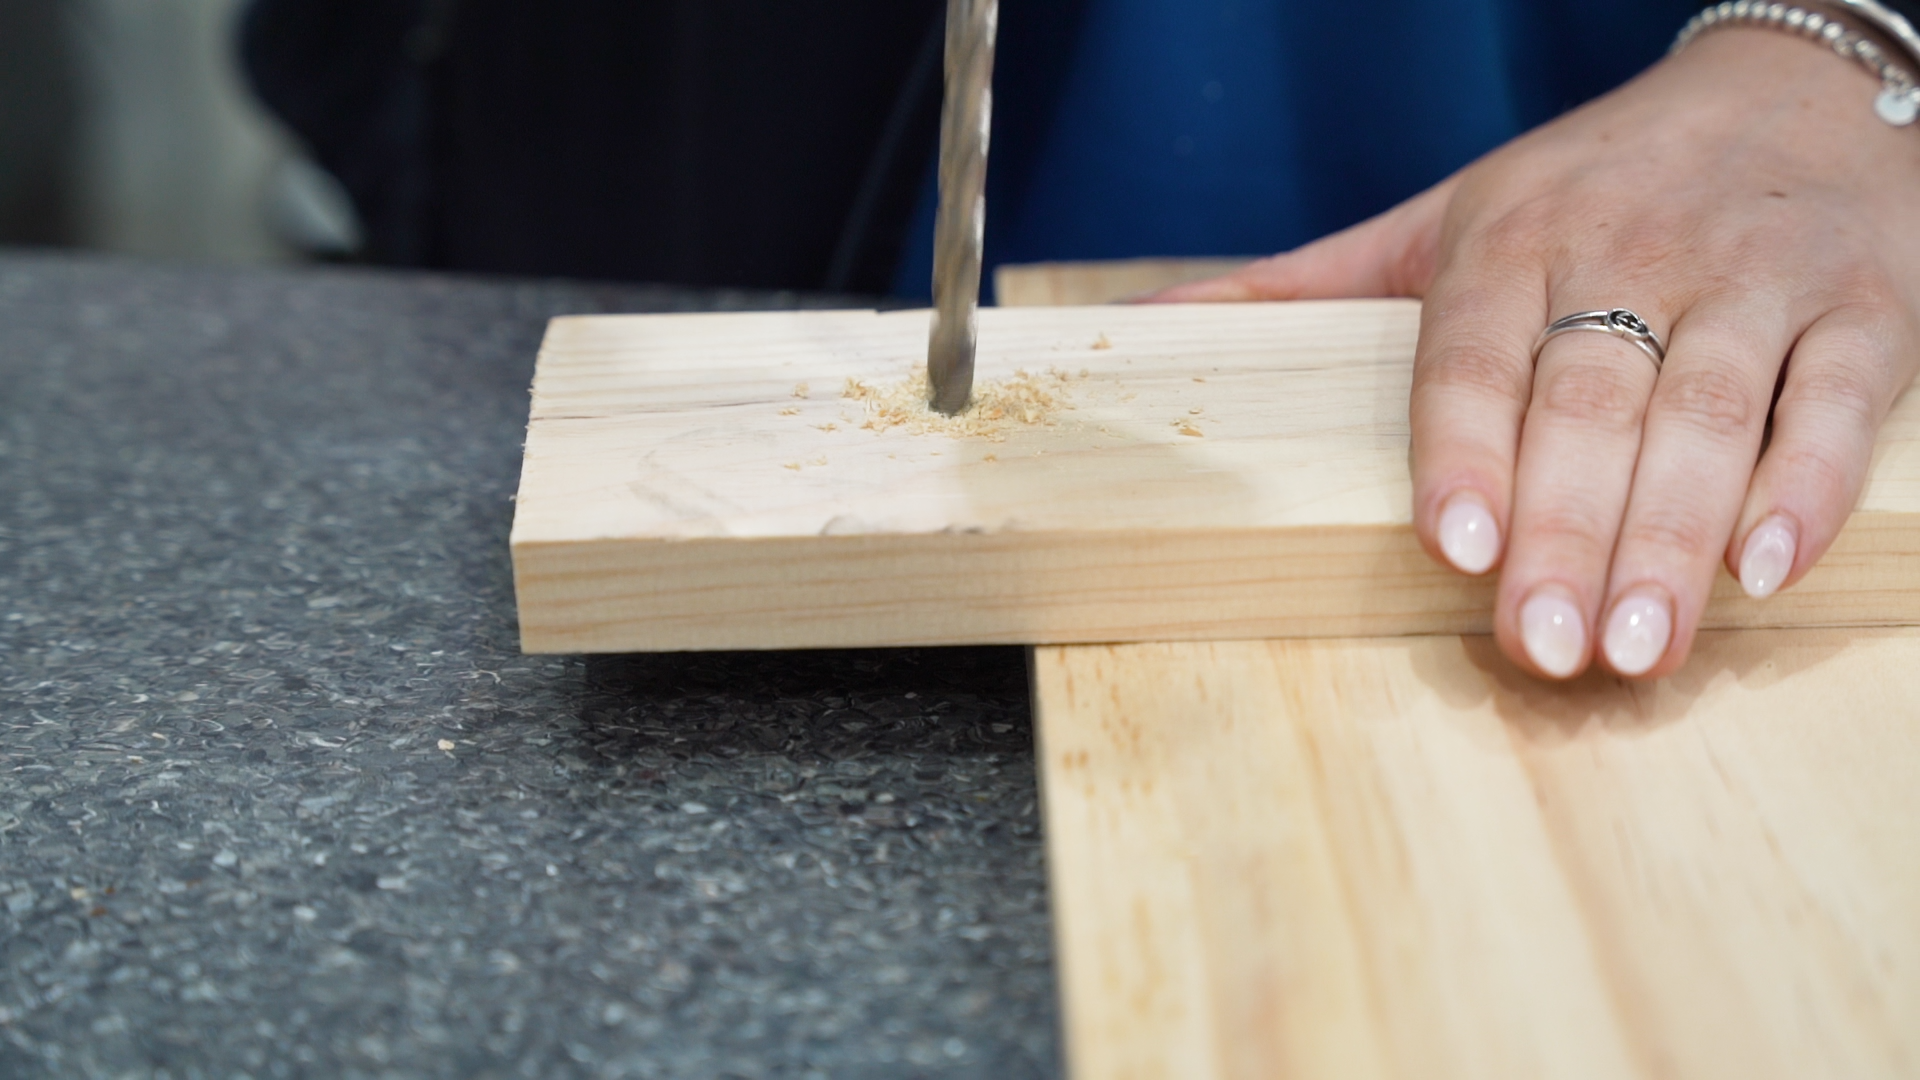
2. Drill drainage holes
Get your drill and an appropriate bit to create some drainage holes in the bottom of your wooden planter box base. The size of the bit determines how many holes you'll need, but don't go overboard, as you don't want to lose soil. Just a few holes are enough to ensure your plants get the drainage they need for healthy growth.
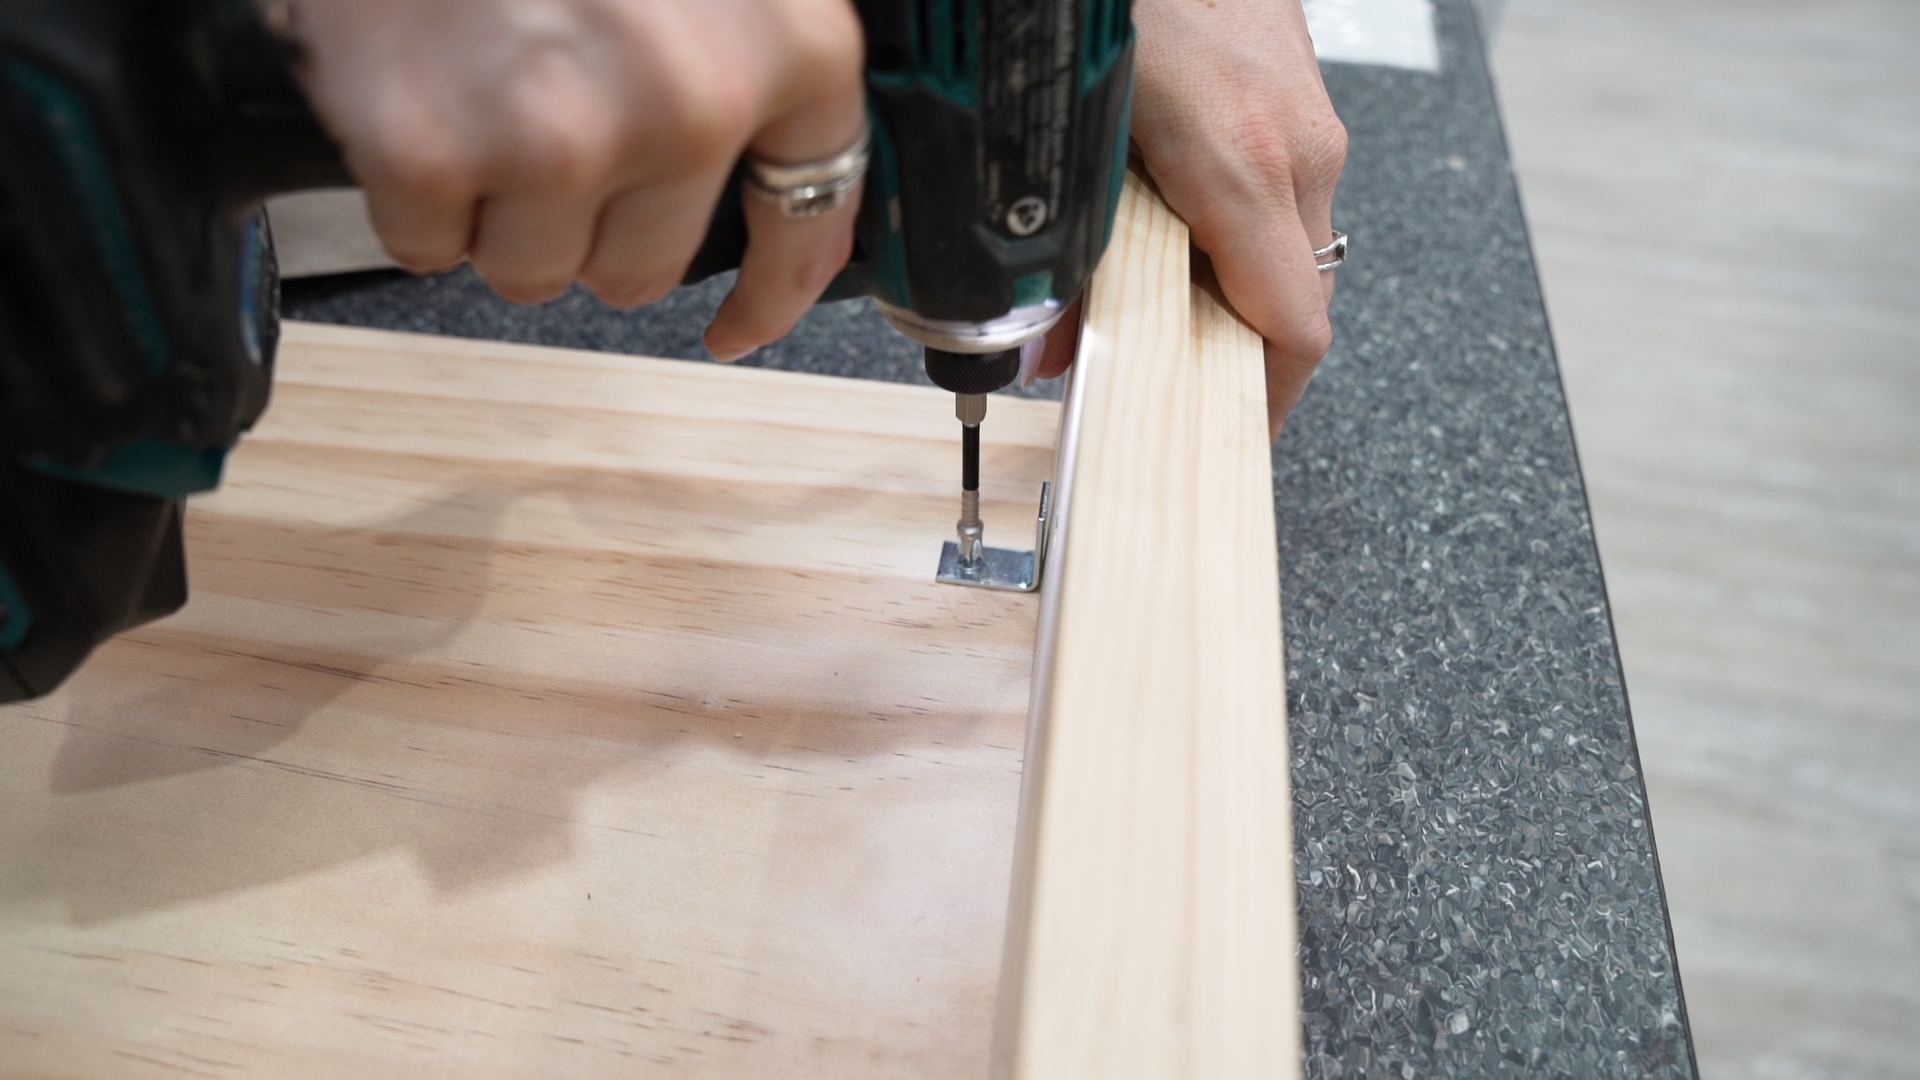
3. Attach the base to the back
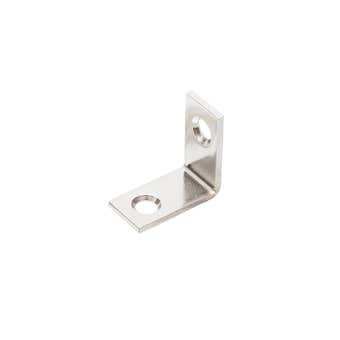
Take two 90-degree angle brackets and position them to connect the base to the back board. Make sure they're evenly spaced. Secure these brackets by drilling into the base first and then into the back board. Ensure everything is level and sturdy.
Using the same method as you did with the base, use the 90-degree angle brackets to connect the sides to the base.
Tip. Run a bit of wood glue along each edge before screwing in place, helping to stick everything together and get it connected smoothly.
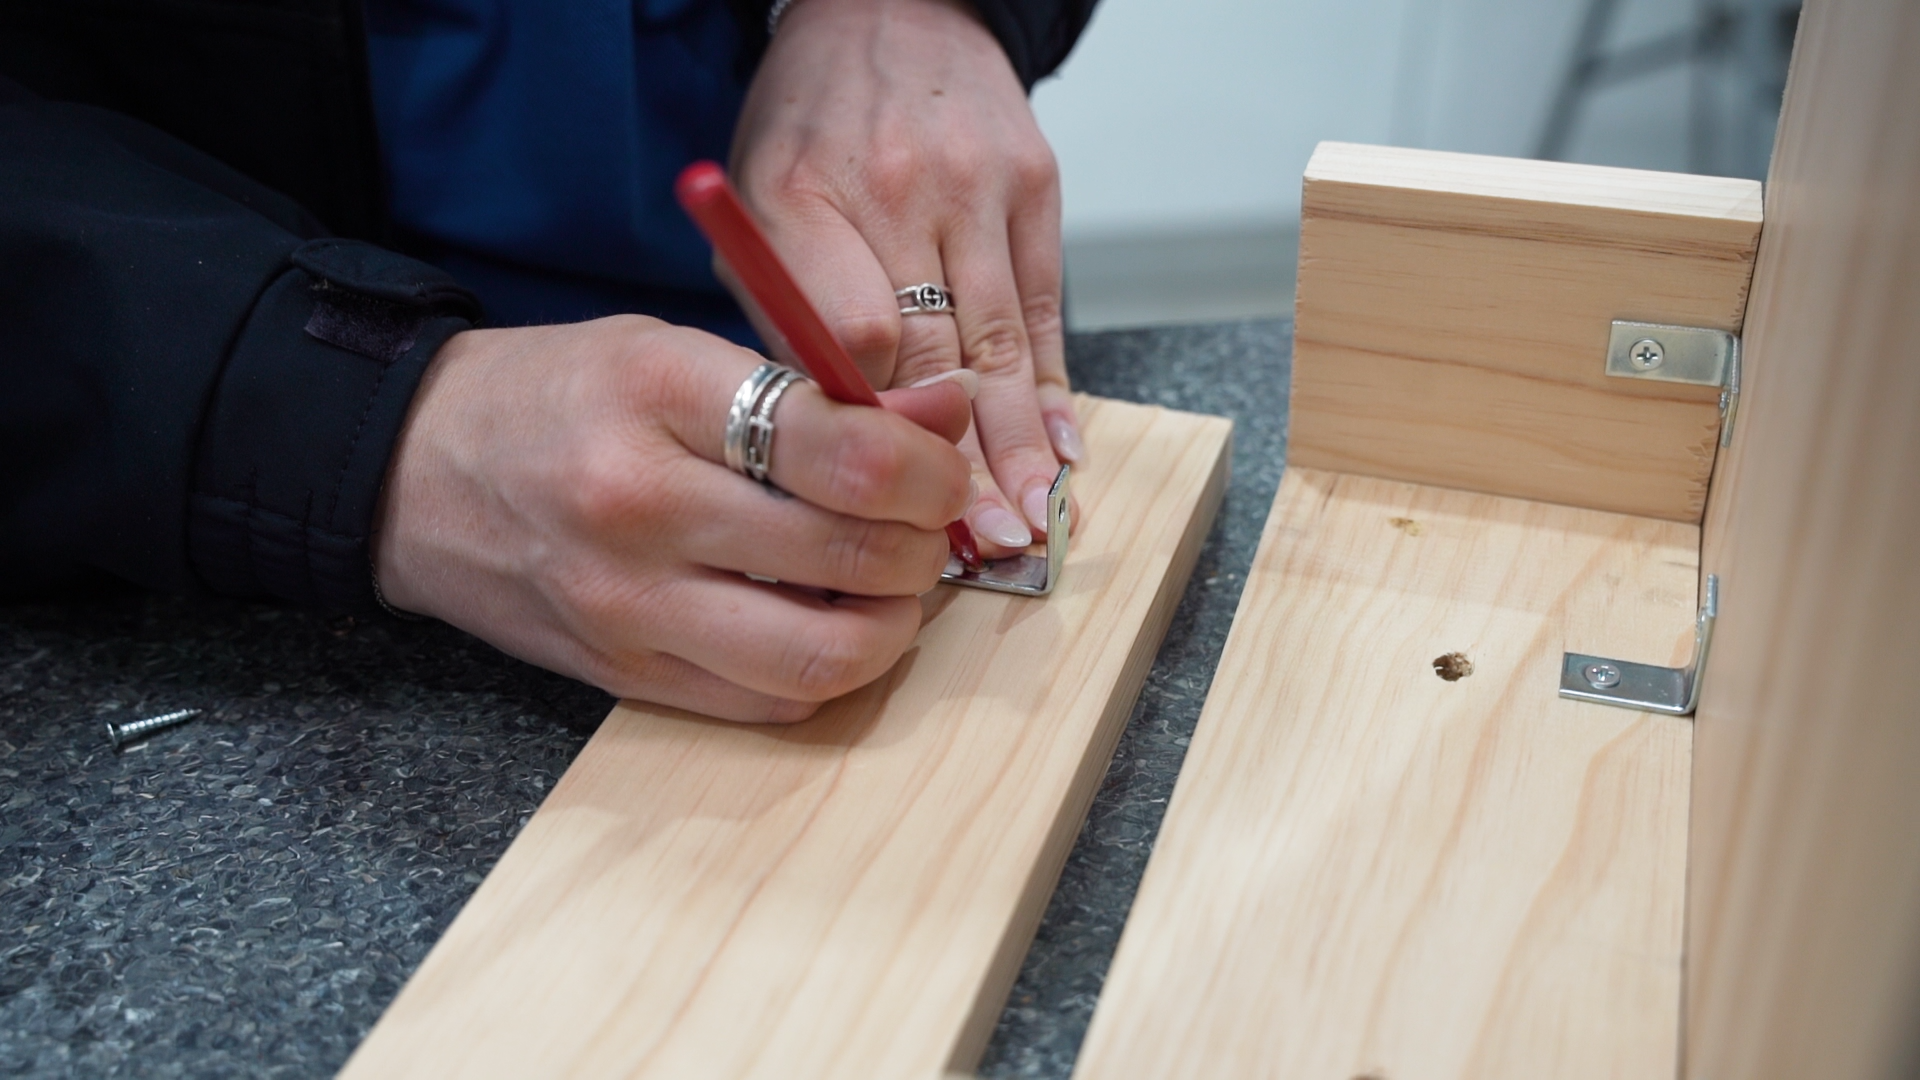
4. Attach the front
Take the front panel and place it in its position and mark where you'd like the 90-degree brackets to be positioned using a pen. After marking, remove the front panel and attach the brackets at those marked spots. Then, place the front panel back against the base and secure it by screwing it on.
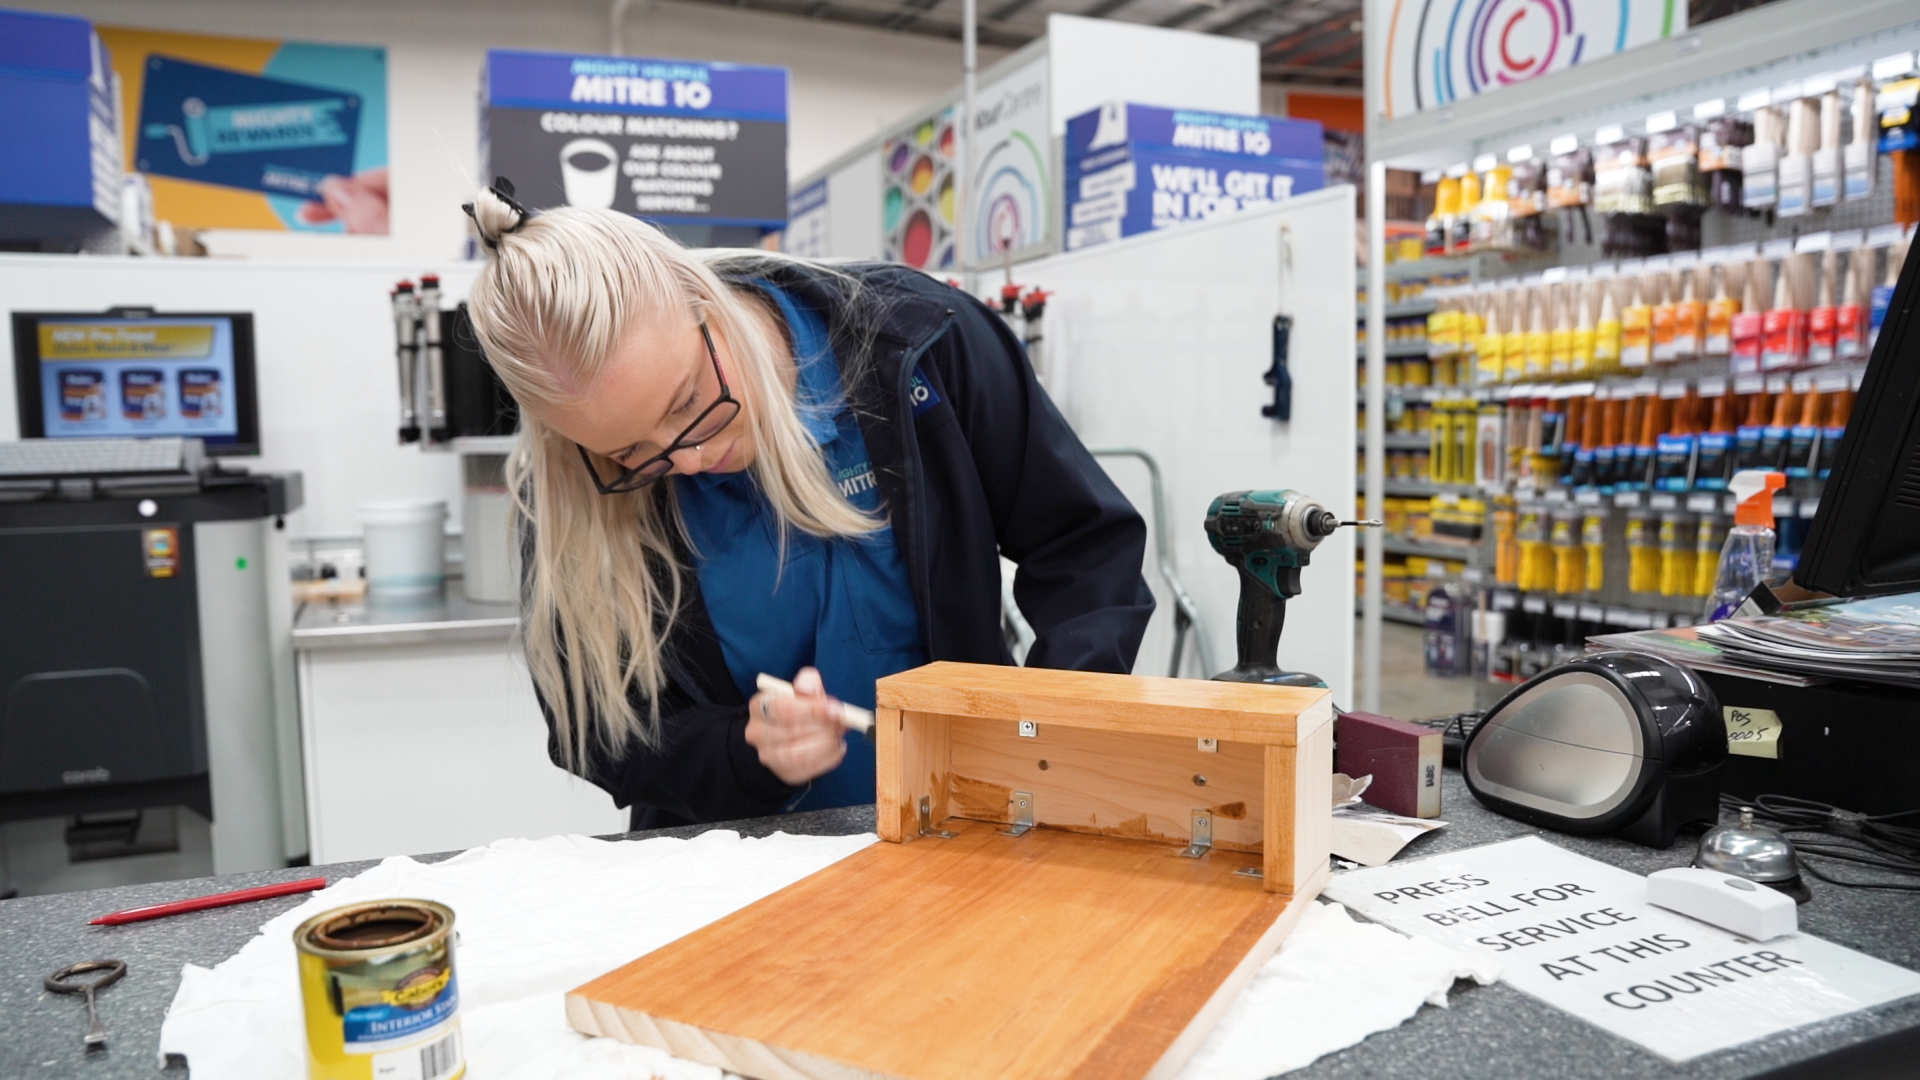
4. Paint and/or Stain
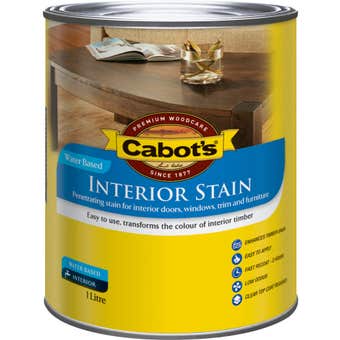
Once your planter is put together, give it a paint or stain based on what suits your style. We chose a Maple stain for ours. Let it dry completely before the next steps.
Tip. Remember to use outdoor-friendly paint or stain to withstand the elements.
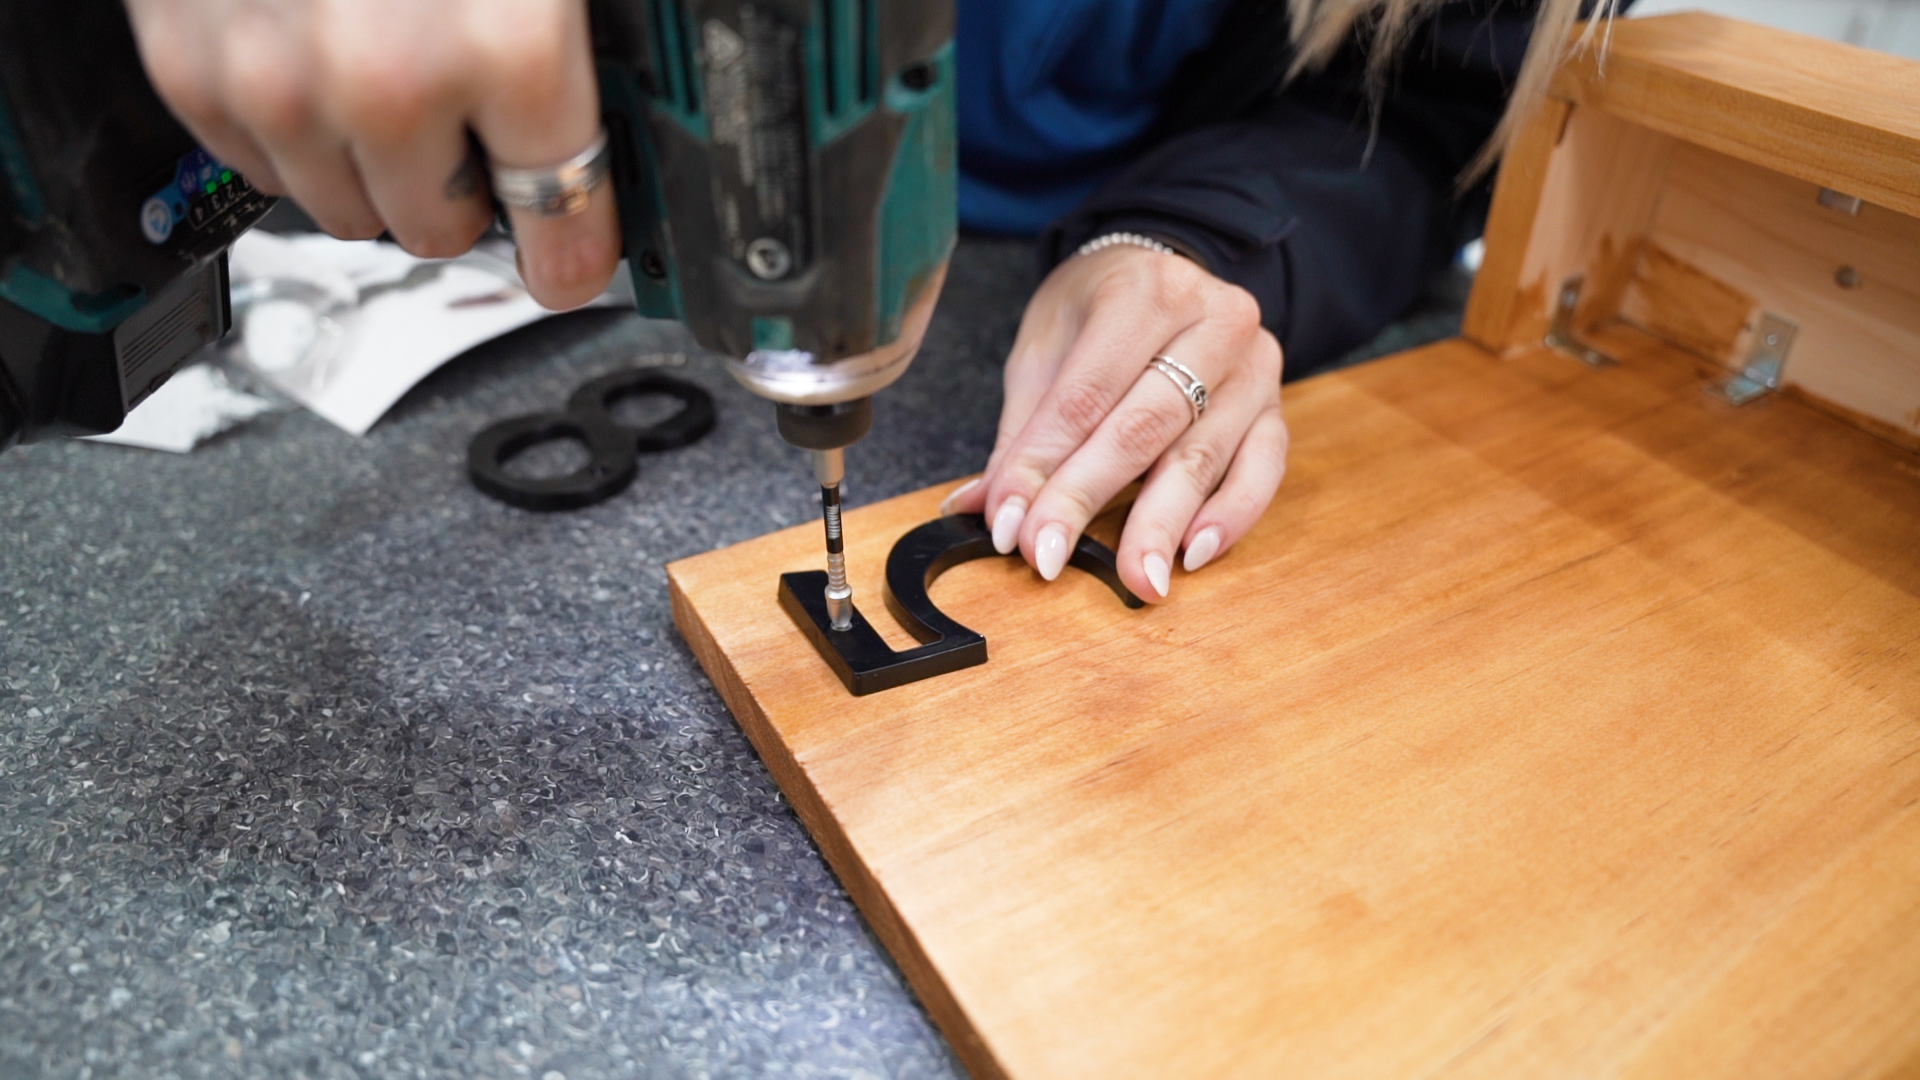
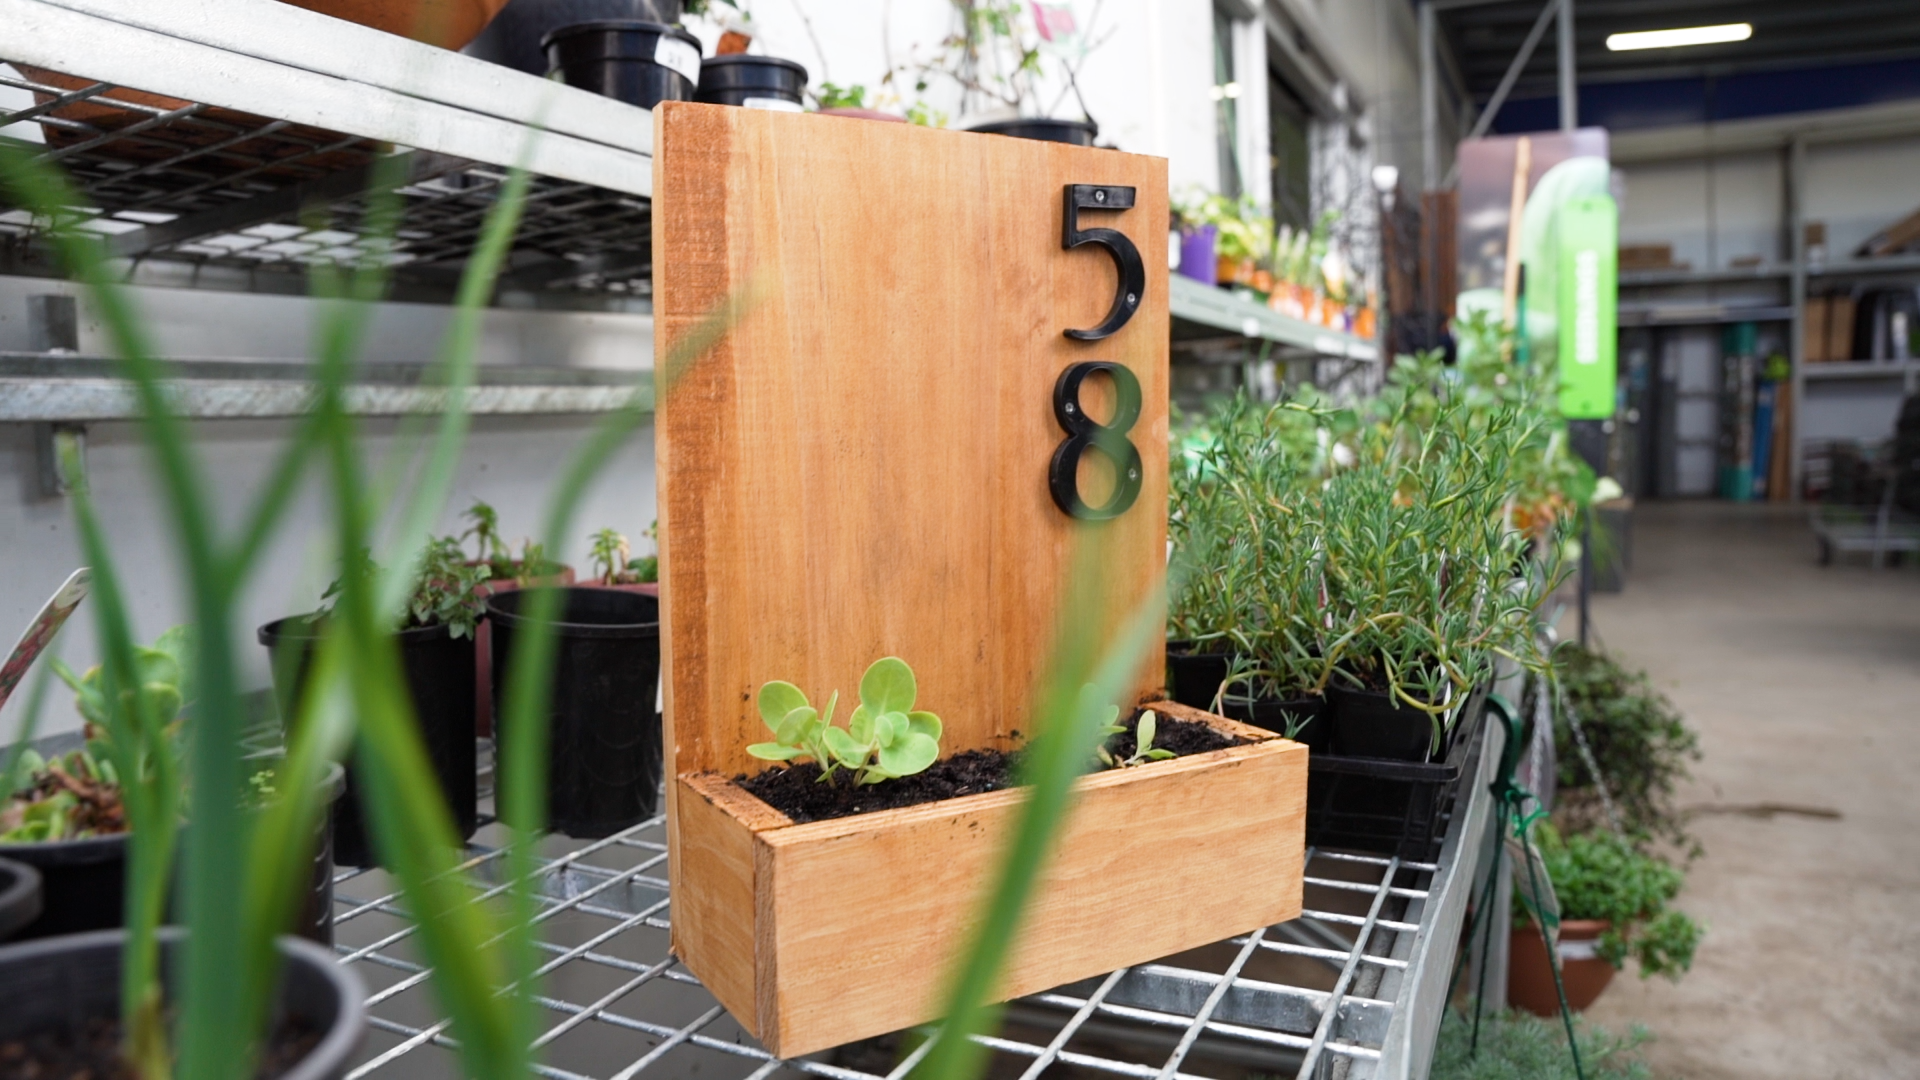
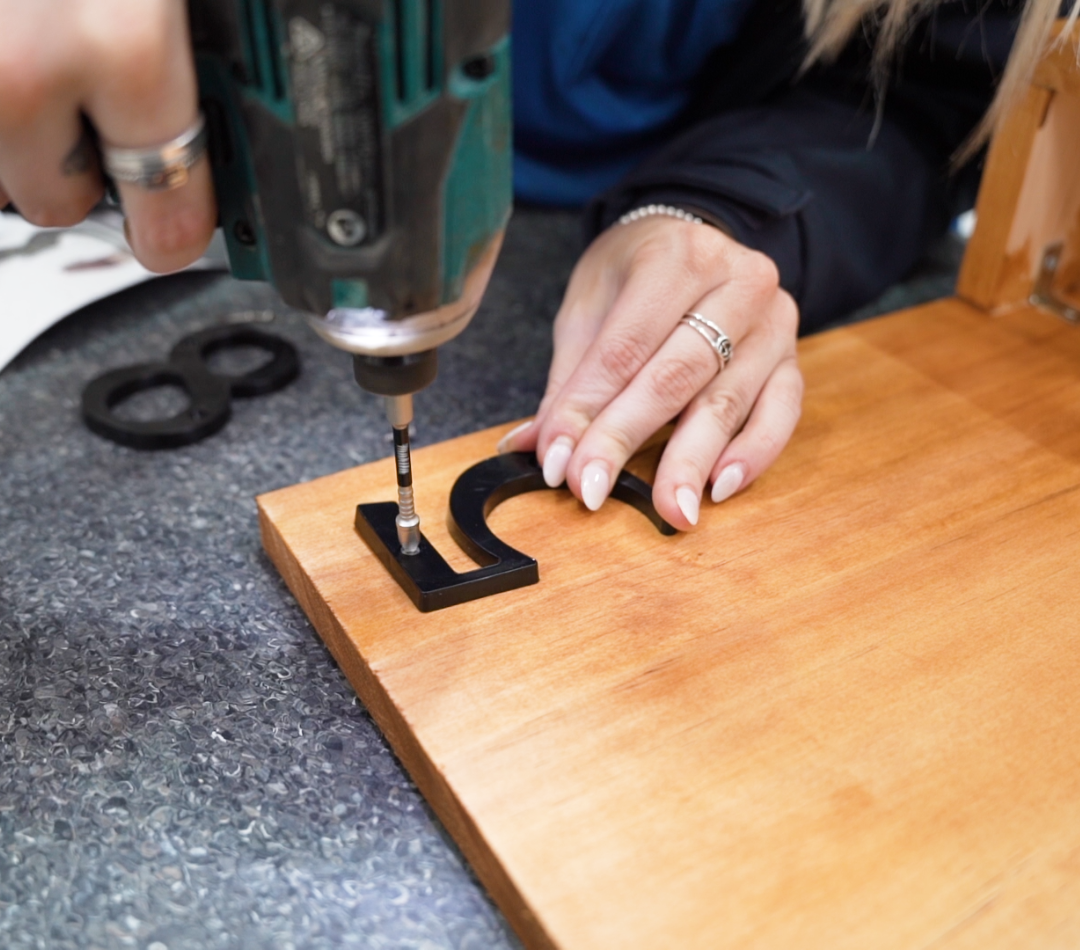
6. Fix your numbers
Decide where you'd like your numbers to sit on the planter. Gently attach the house numbers onto the planter. Just take your time and find the perfect spot for them.
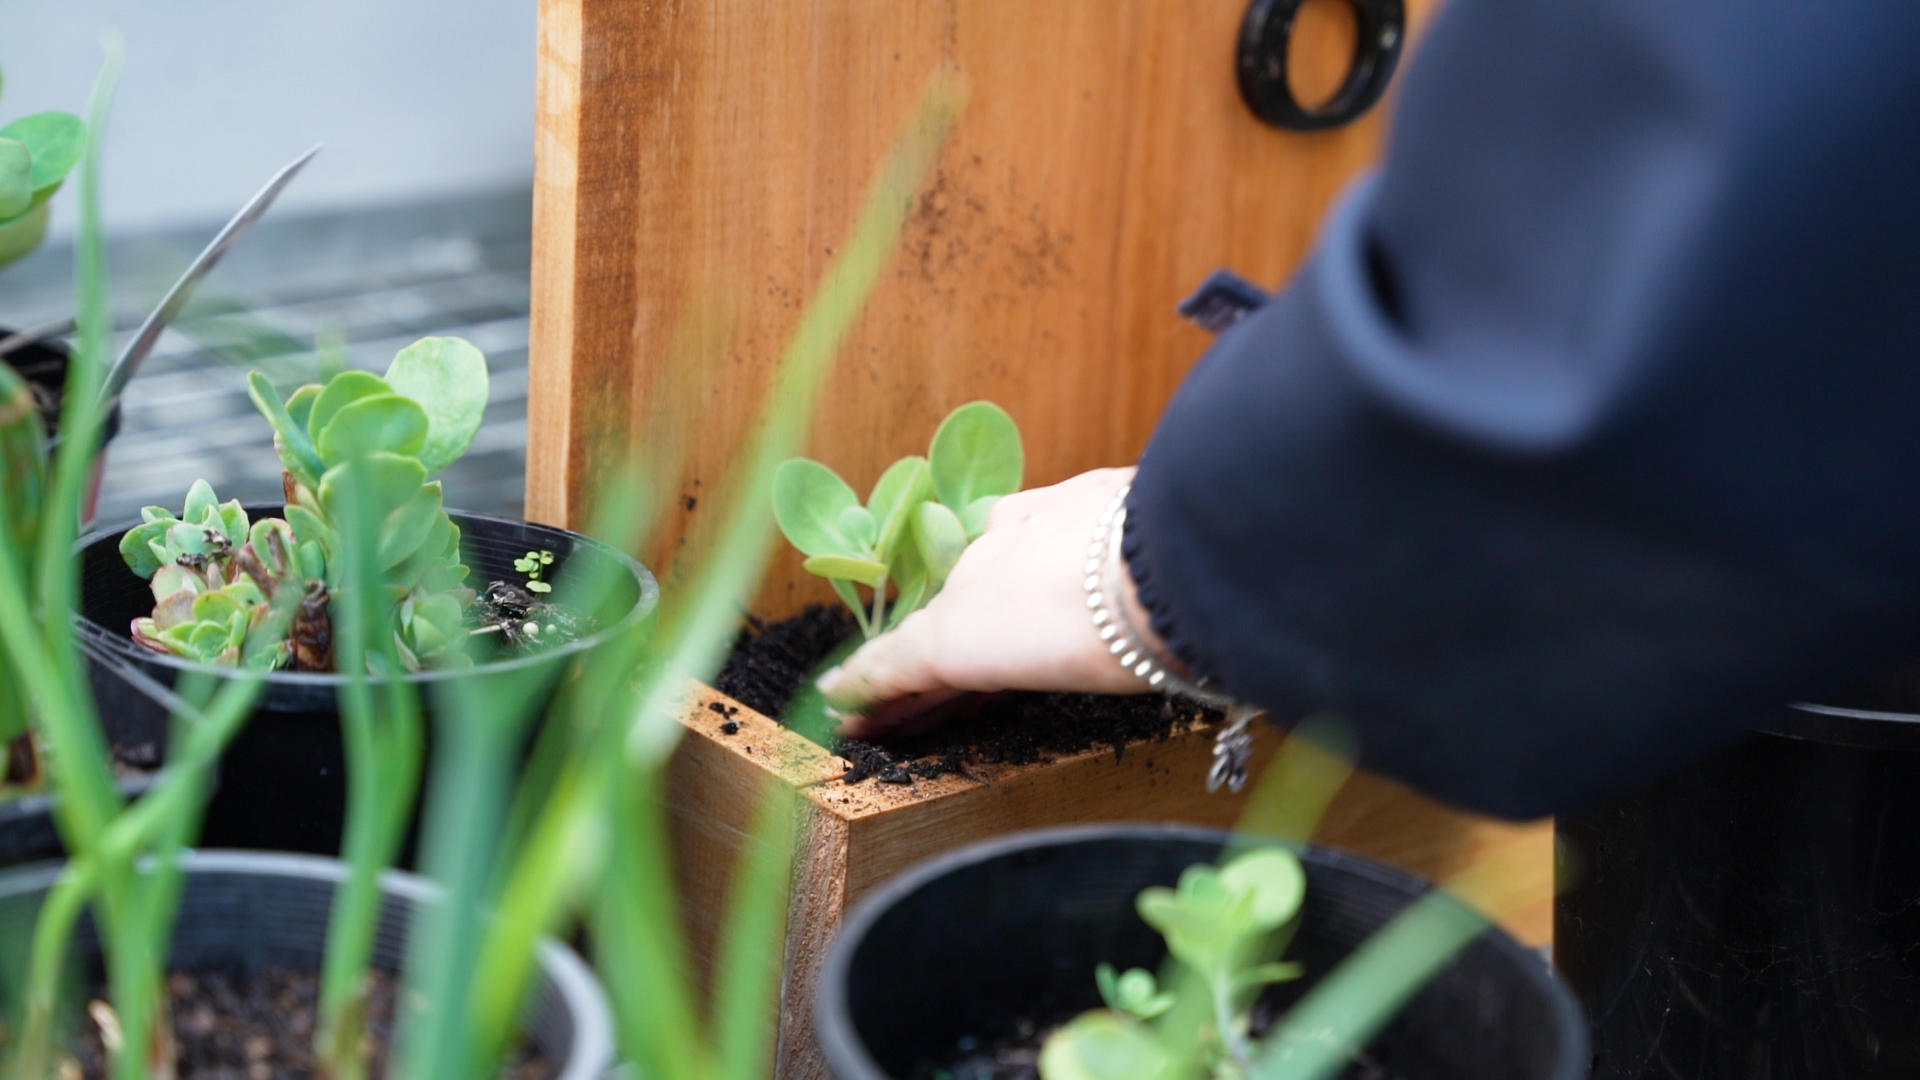
7. Plant your plants
Fill up the planter with potting soil, leaving some room to plant your favourite small flowers or maybe some cool succulents. Think about where you're going put it and pick plants that'll grow well there.
Your new house number planter will not only showcase your address but also add a charming touch to your home exterior. Adjust the steps according to the specific design you're envisioning and enjoy your creation!