- 7 November 2023
Ever wished your potted plants could magically transport themselves to the perfect spot? Well, enter the plant caddy. These handy contraptions, also known as plant stand or plant rollers are like giving your leafy pals their very own chariot, allowing you to effortlessly move those heavy or oversized plant pots around your indoor or outdoor spaces. Plant caddies come in all shapes and sizes, just like the plants they carry.
But guess what? You don't have to rely on store-bought options alone. We've got the DIY expertise to help you create your very own planter caddy.


DIY Project Steps
1. Prepare your timber and assemble boards
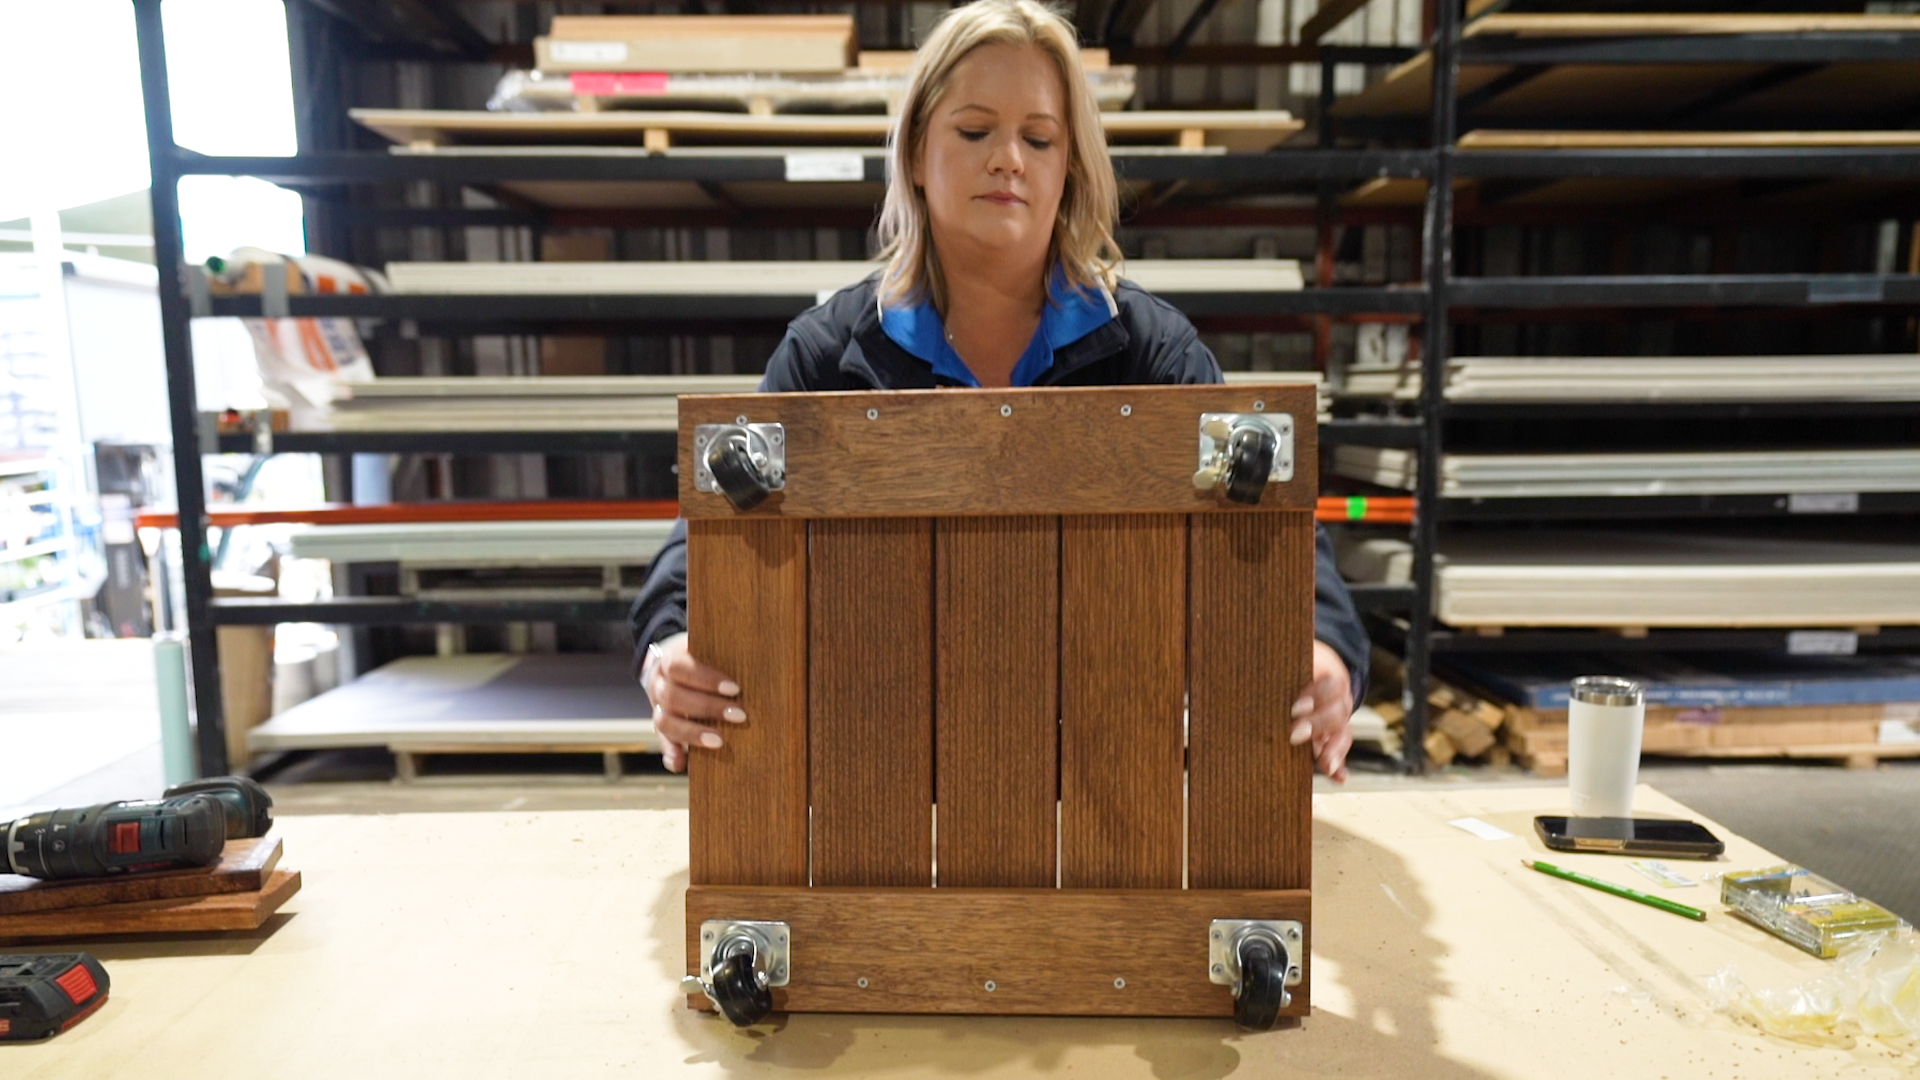
Have your timber cut to size by one of our friendly Team Members in-store. We’ve gone with 90 x 19 Merbau decking at 450mm long for our plant caddy, but you can go with any timber and size that suits your fancy!
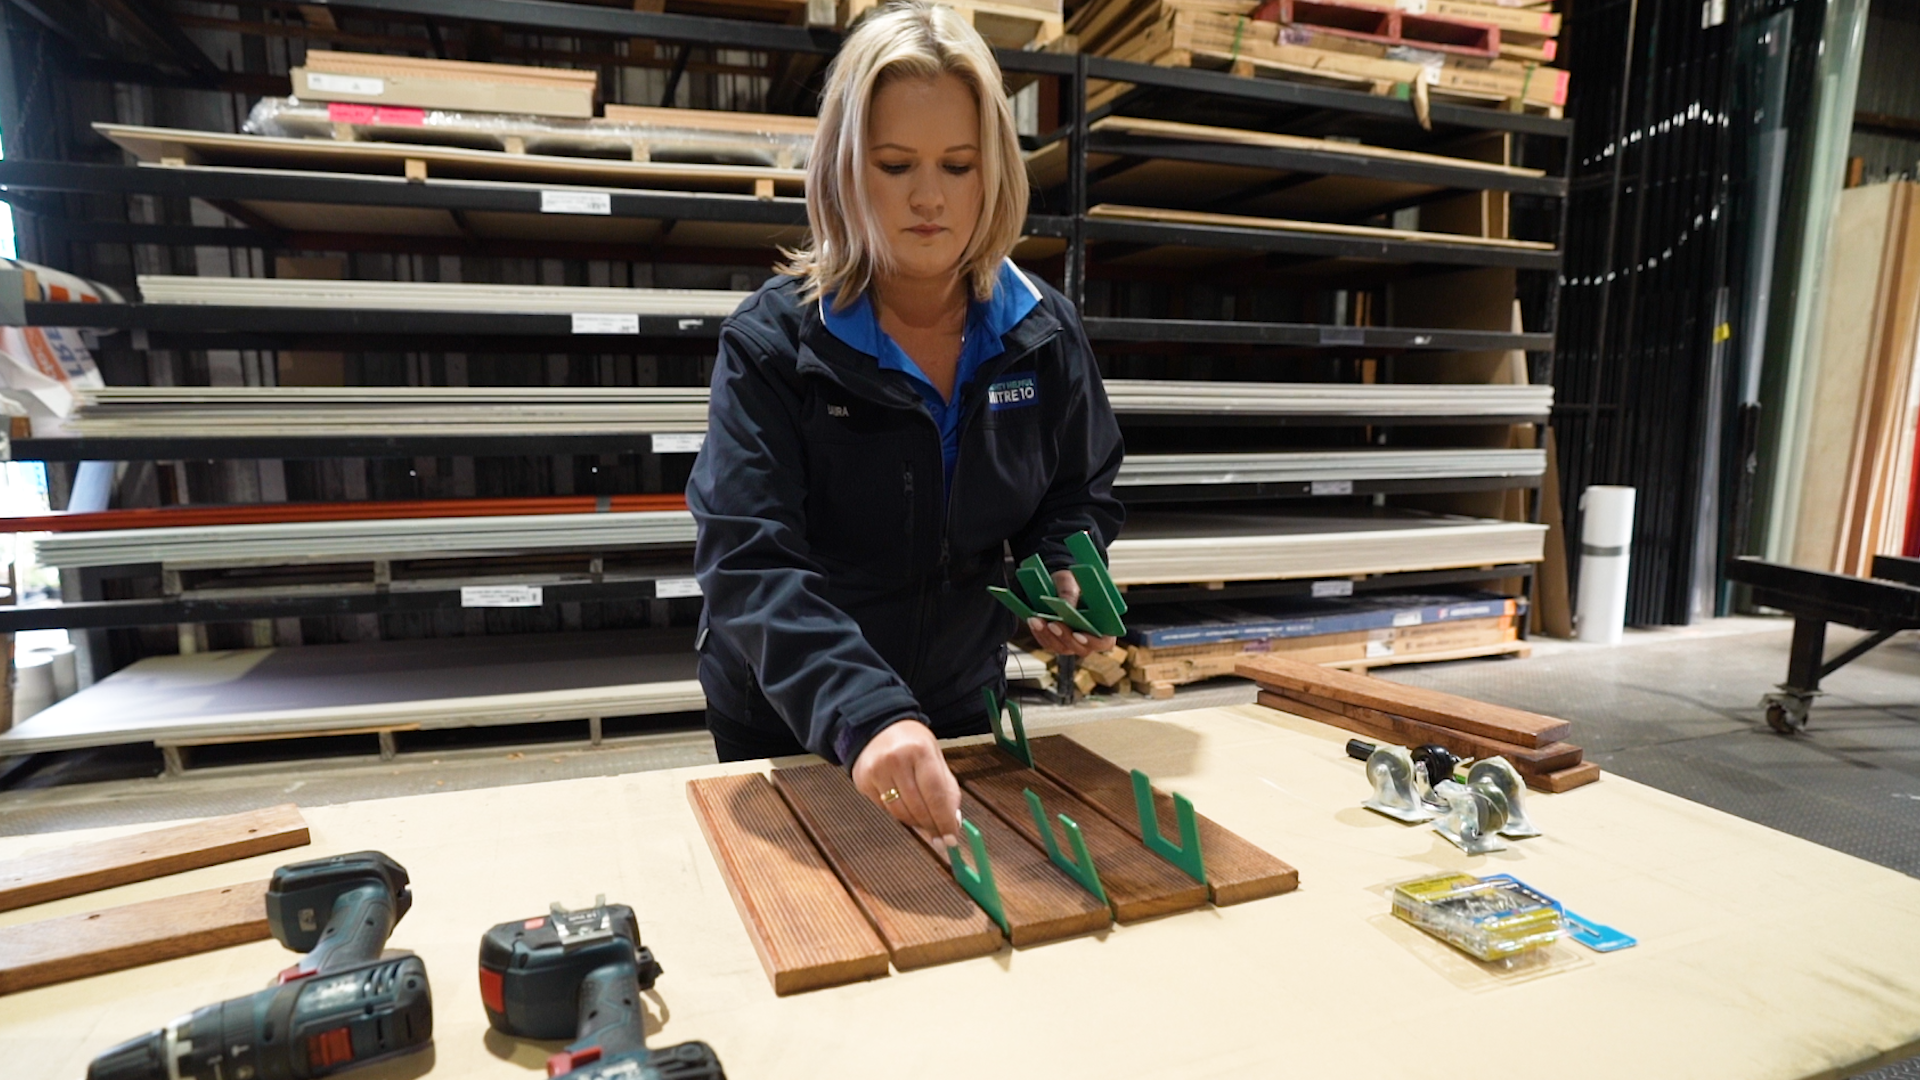
Position five of the boards together with packers between them at the top and bottom. The packers help create an even space between the boards.
2. Install bottom rails
Take one board and position it across the top of the assembled boards. Similarly, place another board across the bottom. Take a moment to align the boards, making sure they are flush and even. This will give your plant caddy a neat and polished appearance.
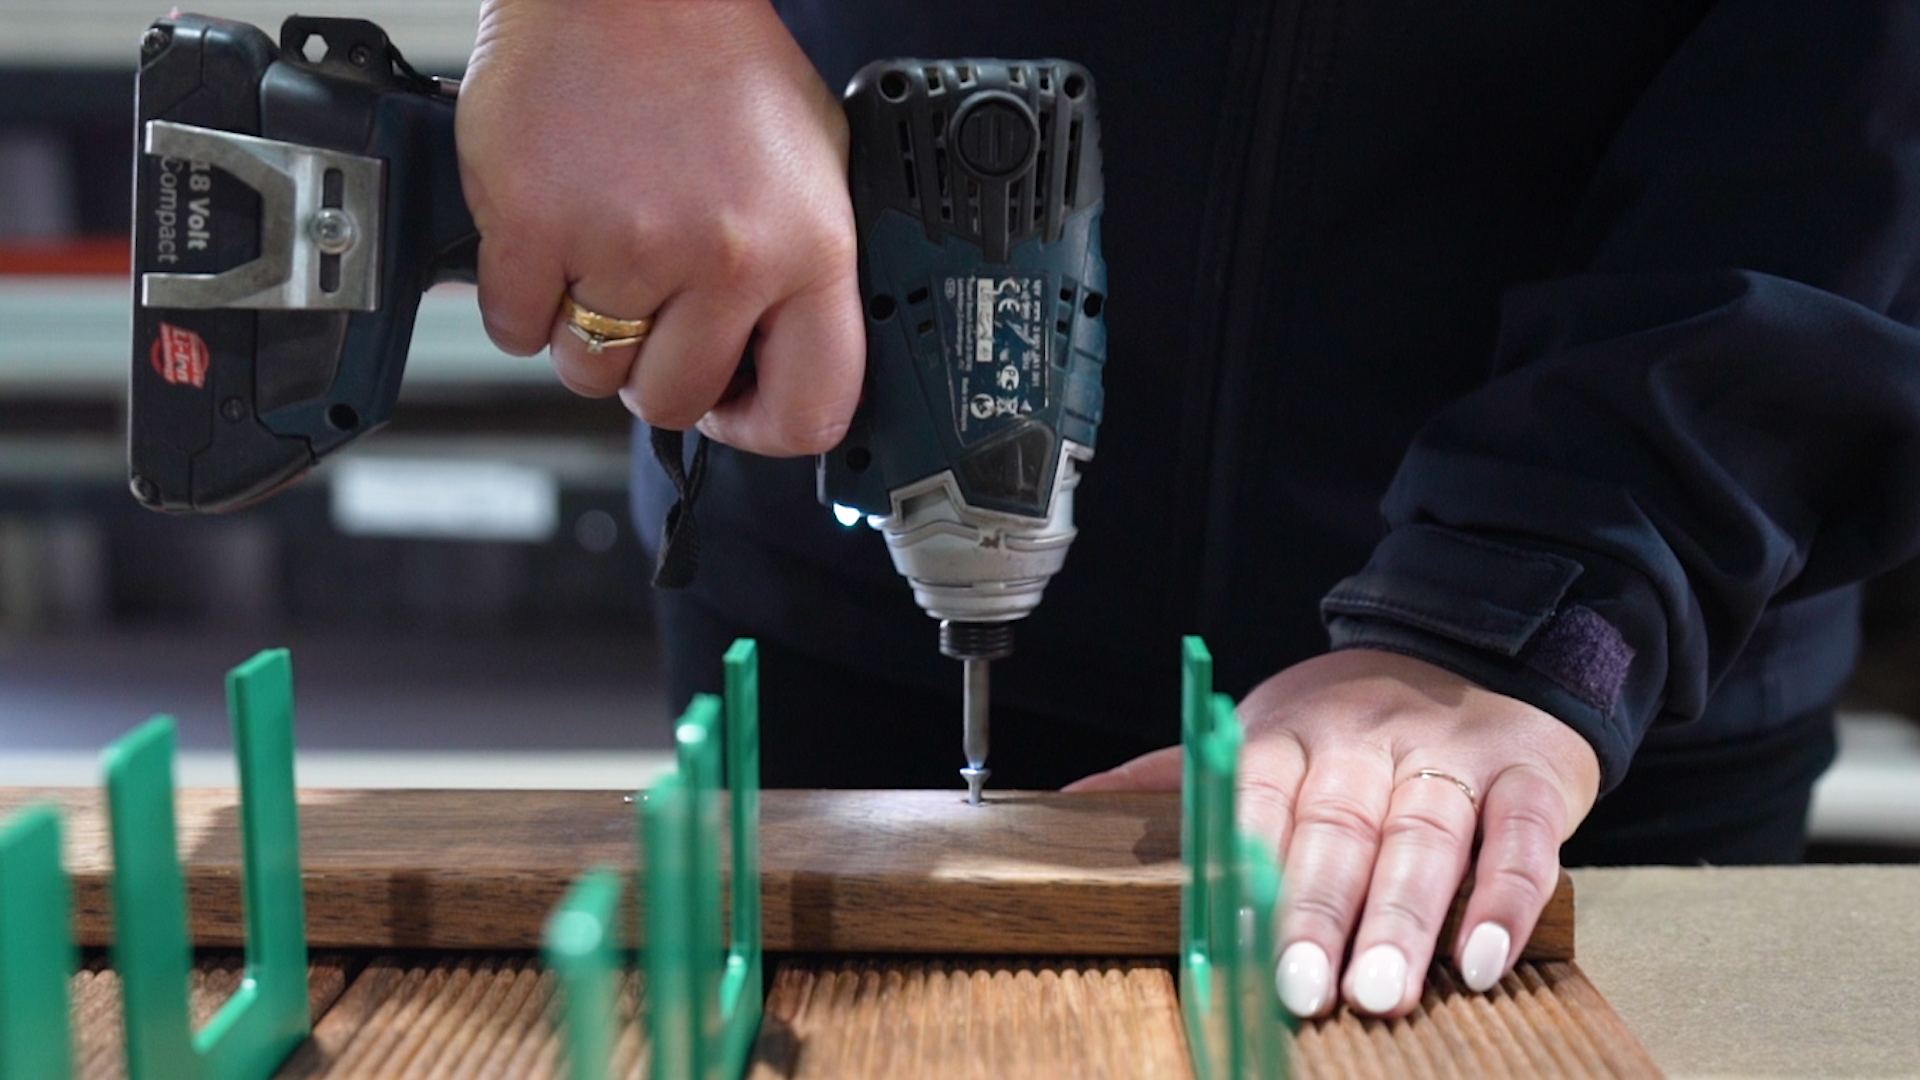
To secure the boards together, grab some screws. Place a screw at each end of the boards and one in the centre to ensure a strong connection. Remember to predrill each hole before inserting the screws to prevent any potential splitting of the timber.
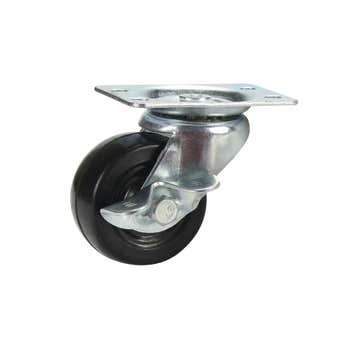
3. Mark the position of caster wheels
Let's add some mobility to your plant caddy, take one of the caster wheels and position it in the corner of the caddy, right on the cross rail that you just attached. Grab a marker or pencil and mark the position of the caster wheel, this will serve as a guide for predrilling. Repeat this process with the remaining three caster wheels, placing one in each corner of the caddy.

4. Predrill holes for the caster wheels
Carefully drill holes at each marked position, taking care drill to an appropriate depth that accommodates the length of the screws. By predrilling these holes, you'll make it easier to attach the caster wheels securely to the plant caddy.
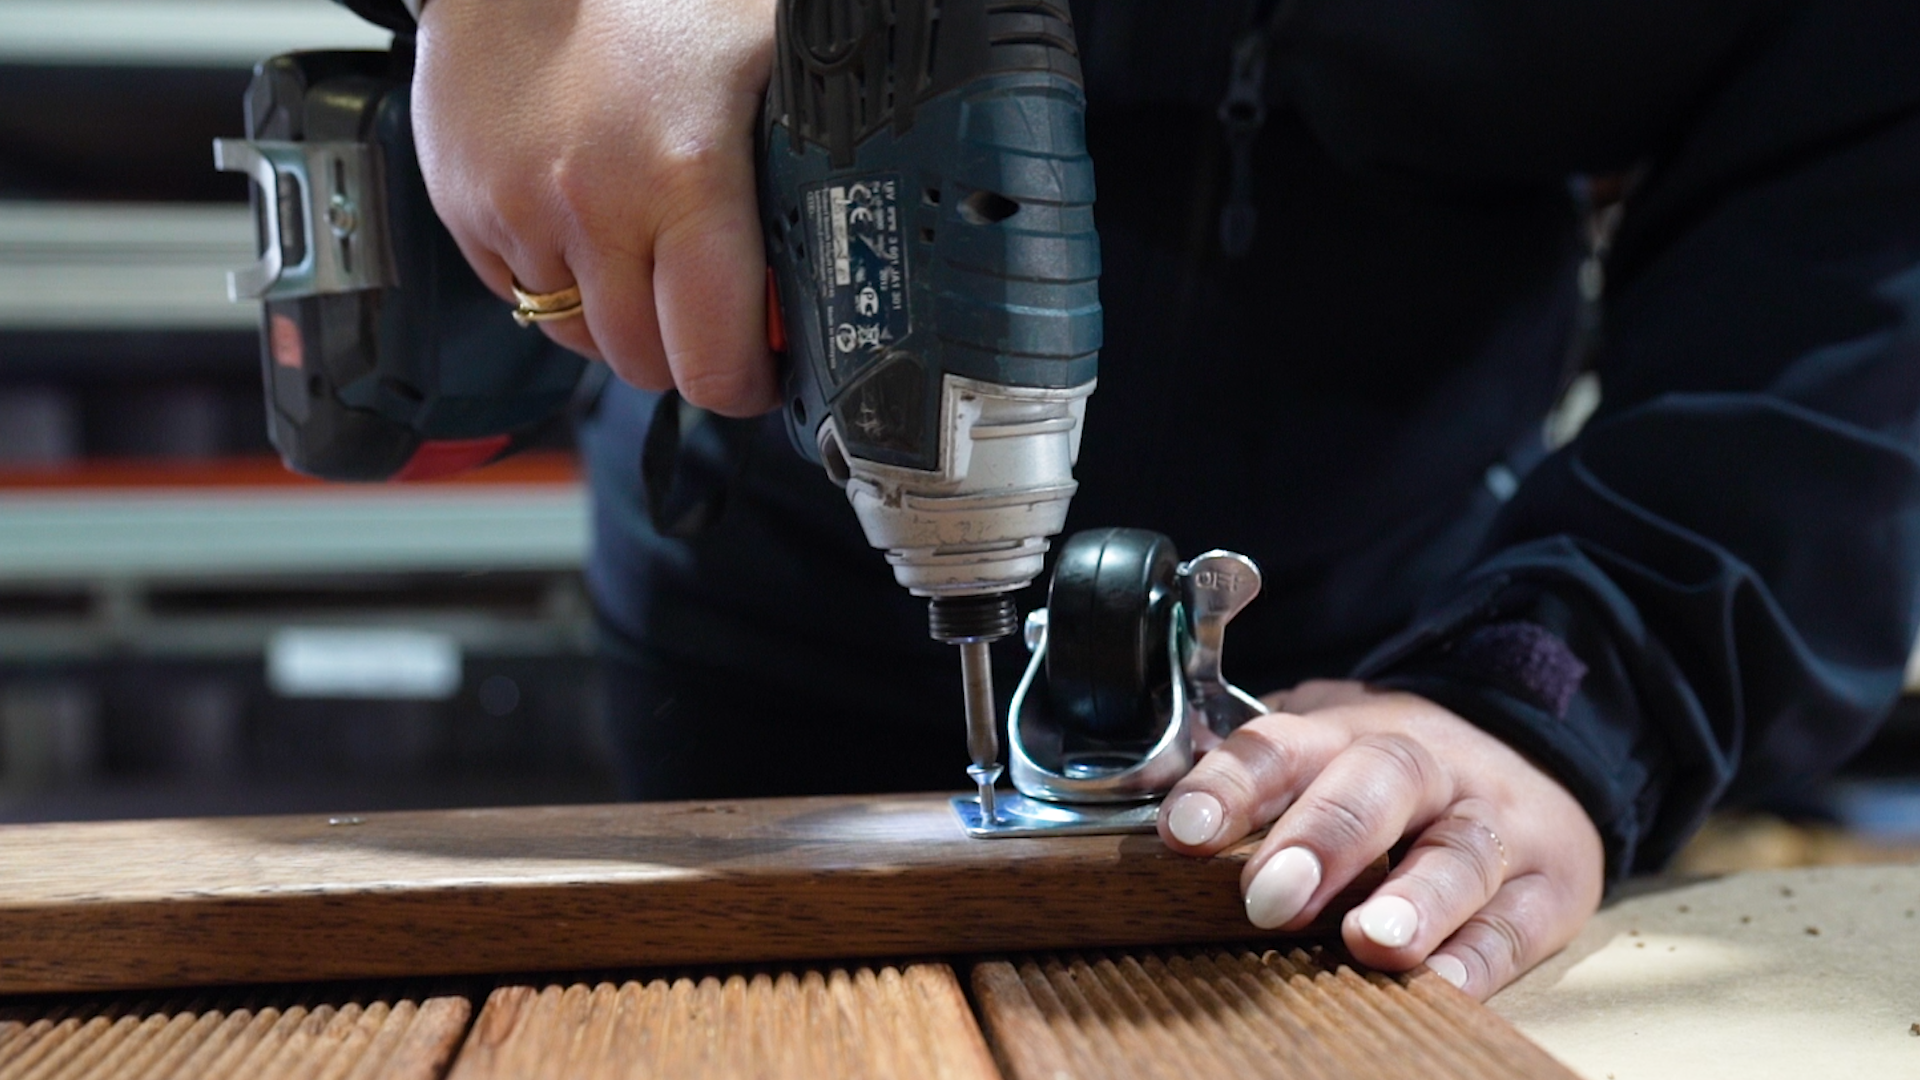
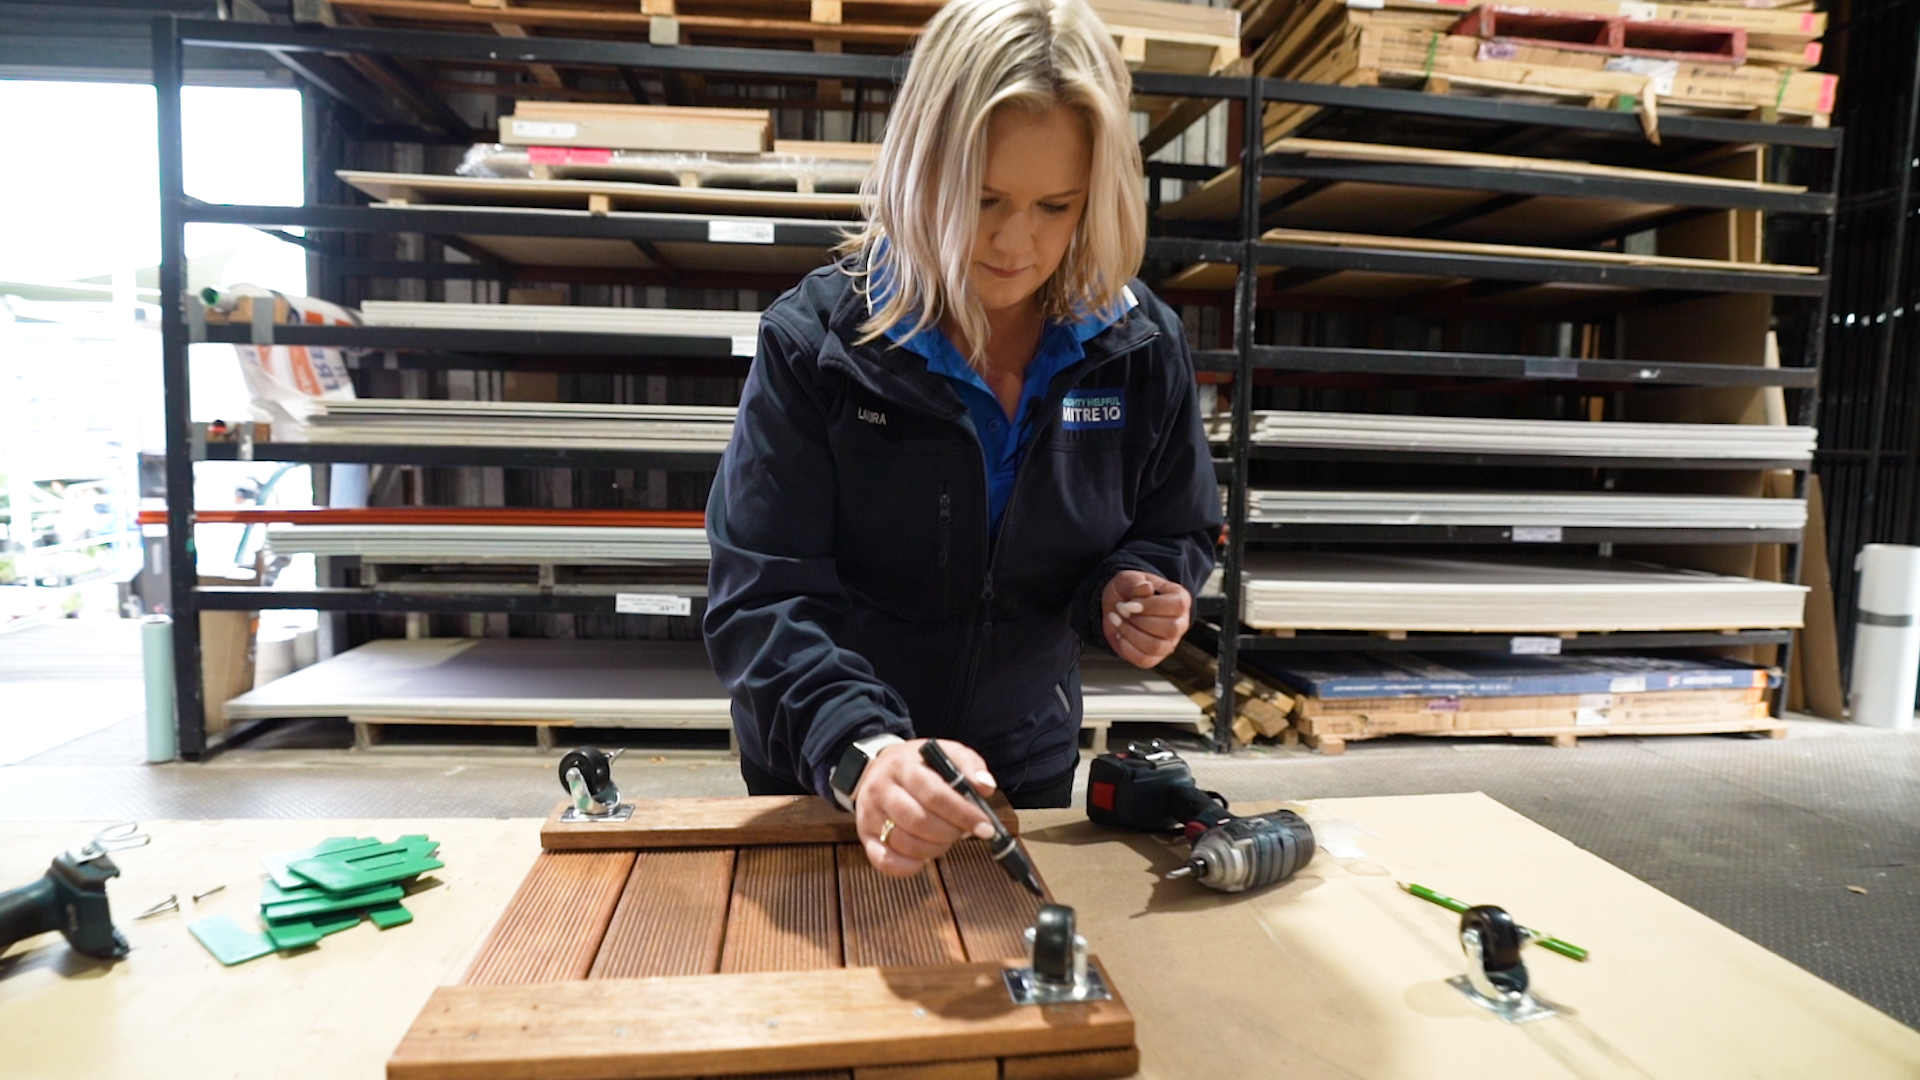
5. Screw in the caster wheels
Align the caster wheel with the predrilled holes and place the screws in the holes. Using your drill, carefully screw in the caster wheel until it is securely attached. Be cautious not to overtighten, as it may cause damage to the timber or affect the smooth rolling of the wheels. Repeat this process for each of the remaining caster wheels, ensuring they are all securely fastened to the plant caddy.
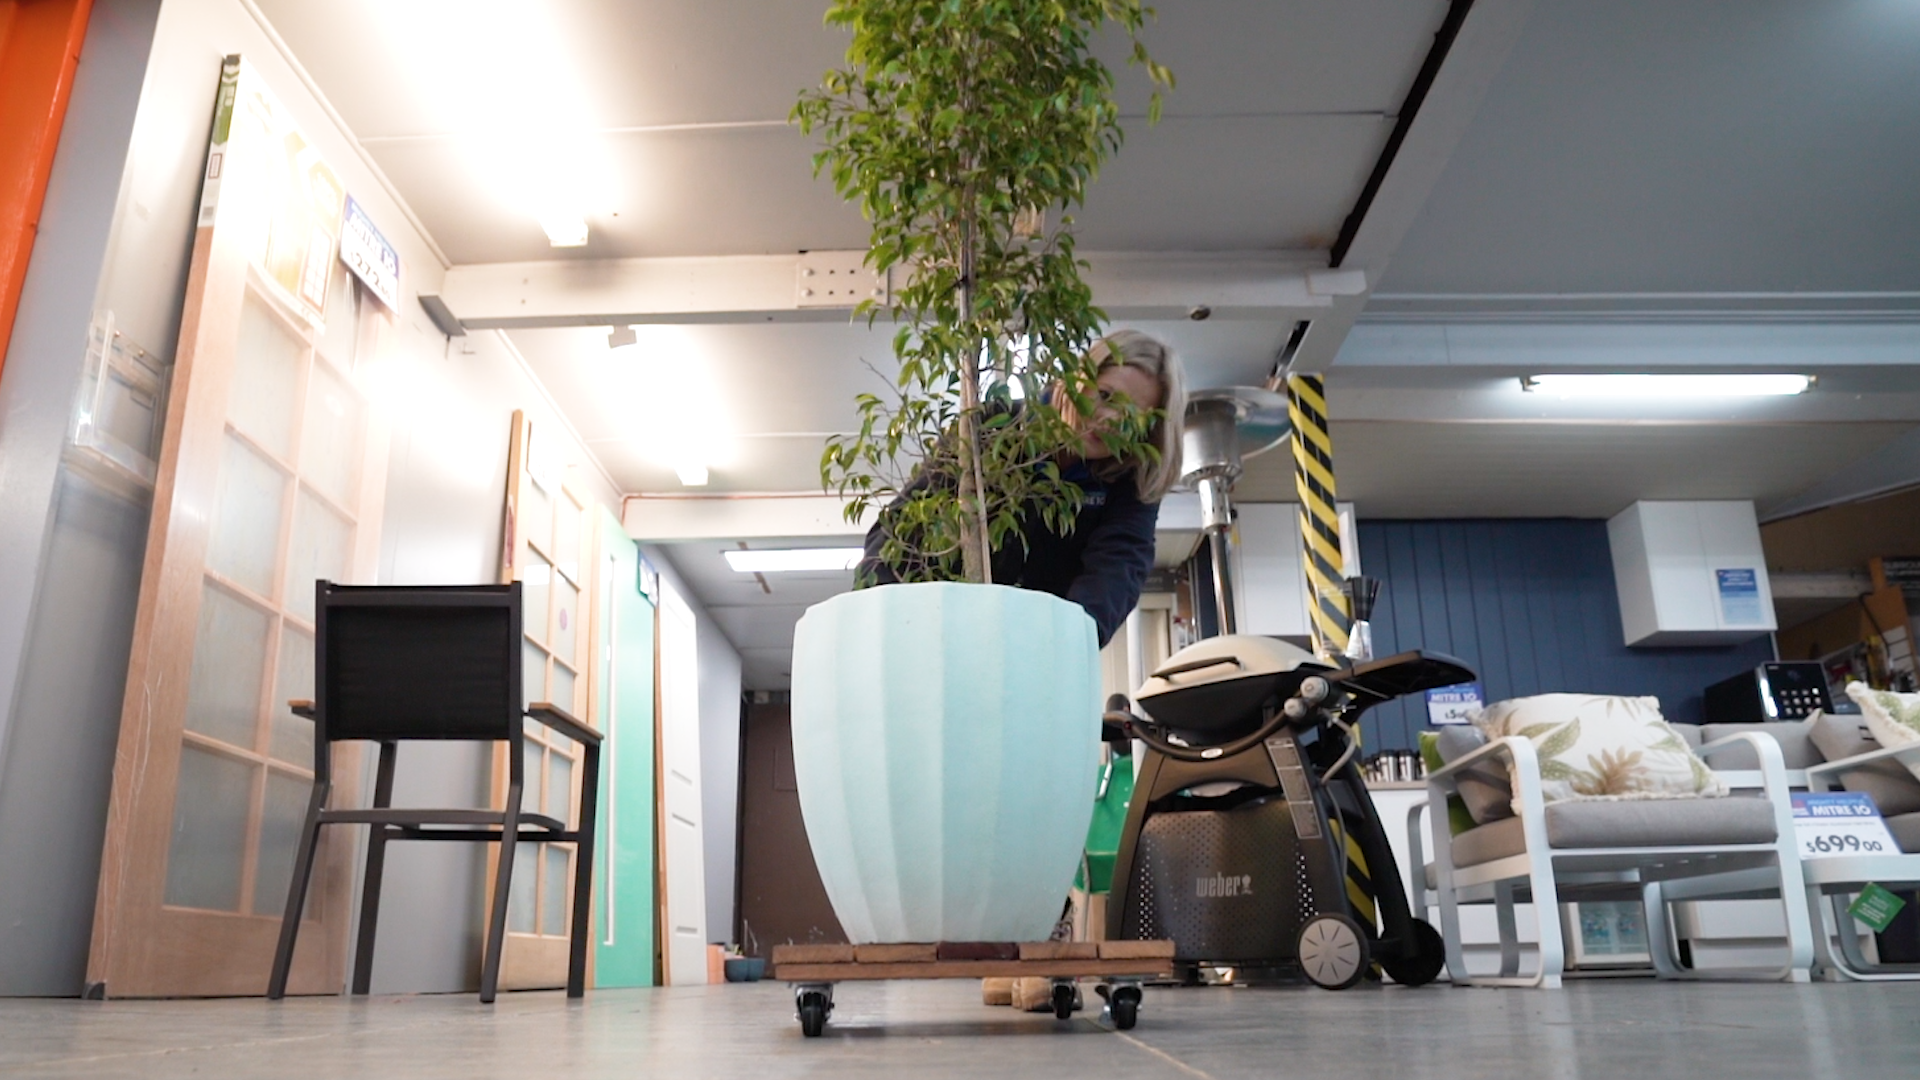
With the caster wheels securely attached, your plant caddy is now ready to roll! Effortlessly glide it around your space, moving your plants with ease and grace. Take a moment to appreciate your handiwork and enjoy the convenience of your newly assembled plant caddy.