


- 19 July 2022
Preparation for painting weatherboards can be time consuming but it’s worth doing this part right to give your topcoat the best foundation to withstand the test of time. Transform the look of your home with these easy steps.
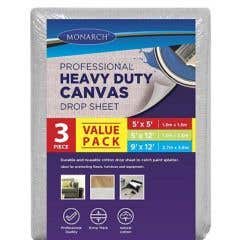
Shopping List


DIY Project Steps

1. Prepare your weatherboards
The condition of the boards you’ll be painting will determine how you prepare them. Are they:
- New
- Old
- Pre-primed
- Previously painted New weatherboards
New weatherboards
If new weatherboards have been left exposed to the elements for more than two weeks, give them a good wash-down and sand them back; removing any grey timber.
Old pre-painted weatherboards
If your boards are old, there may be visible flaking paint. It’s best to be thorough and use a scraper to go over all the boards, removing any loose flakes. Always test the adhesion of pre-painted surfaces (refer to Step 2), and ensure you’ve checked for lead in the paint by using an instant lead test kit. Your old weatherboards will also need a good wash and sand before you begin the painting process.
Pre-primed or Pre-painted
When painting pre-primed or pre-painted flat boards, it’s best to contact the manufacturer for preparation advice which can differ from traditional surfaces. Always test the adhesion of pre-painted surfaces (refer to Step 2).

2. Conduct an adhesion test (for pre-painted surfaces)
Score a small letter X into the paint and apply a piece of sticky tape over it, press down and then rip it off quickly. If there are any flakes of paint on the tape, the paint will need to be removed by sanding it back.

3. Prep
Next step, fill in any holes with an exterior filler, allow to dry and then sand off. Wipe down surface to remove any dust and other particles. Mask off any areas that aren’t to be painted including window and door frames, light fittings and other fixtures.

4. Painting Exterior
Now you’re ready to start painting. For the exterior of your home, Dulux Weathershield, with Maxiflex technology, will give a tough flexible finish for long standing protection against all Australian weather conditions. It is also self-priming on most surfaces including timber, bricks and concrete, so long as the surface is well prepared.

5. Application
Apply one coat of 1Step Prep and two coats of Weathershield when using a colour from an Extra Bright Base.

6. Cutting
Start by cutting in around the weatherboards, working in sections of three boards at a time. Cut in along the length of the wall for each of the three boards, working from top to bottom. Avoid cutting in too far ahead, as painting over dry paint will give an uneven finish.

7. Painting underside
Paint the underside of the boards with a brush before working your way along the boards with either a roller or a brush using long even strokes. Always work along the full length of the boards to avoid overlap.

8. Dry
Once complete, wait around two hours for that coat to dry and repeat with your next coat.

9. Project complete
So there you have it, transform the look of your home with these easy steps.


