- 30 August 2023
Are you tired of the same old look of your bedside table? It's time to give it a fresh and vibrant makeover that will breathe new life into your bedroom decor. With just a few simple steps and the right materials, you can transform your bedside table into a stunning piece of furniture that reflects your personal style. In this article, we'll guide you through each step of the process, from cleaning and prepping the table to adding the final decorative touches. Get ready to unleash your creativity and achieve a bedside table that's not only functional but also a true visual delight.
DIY Project Steps
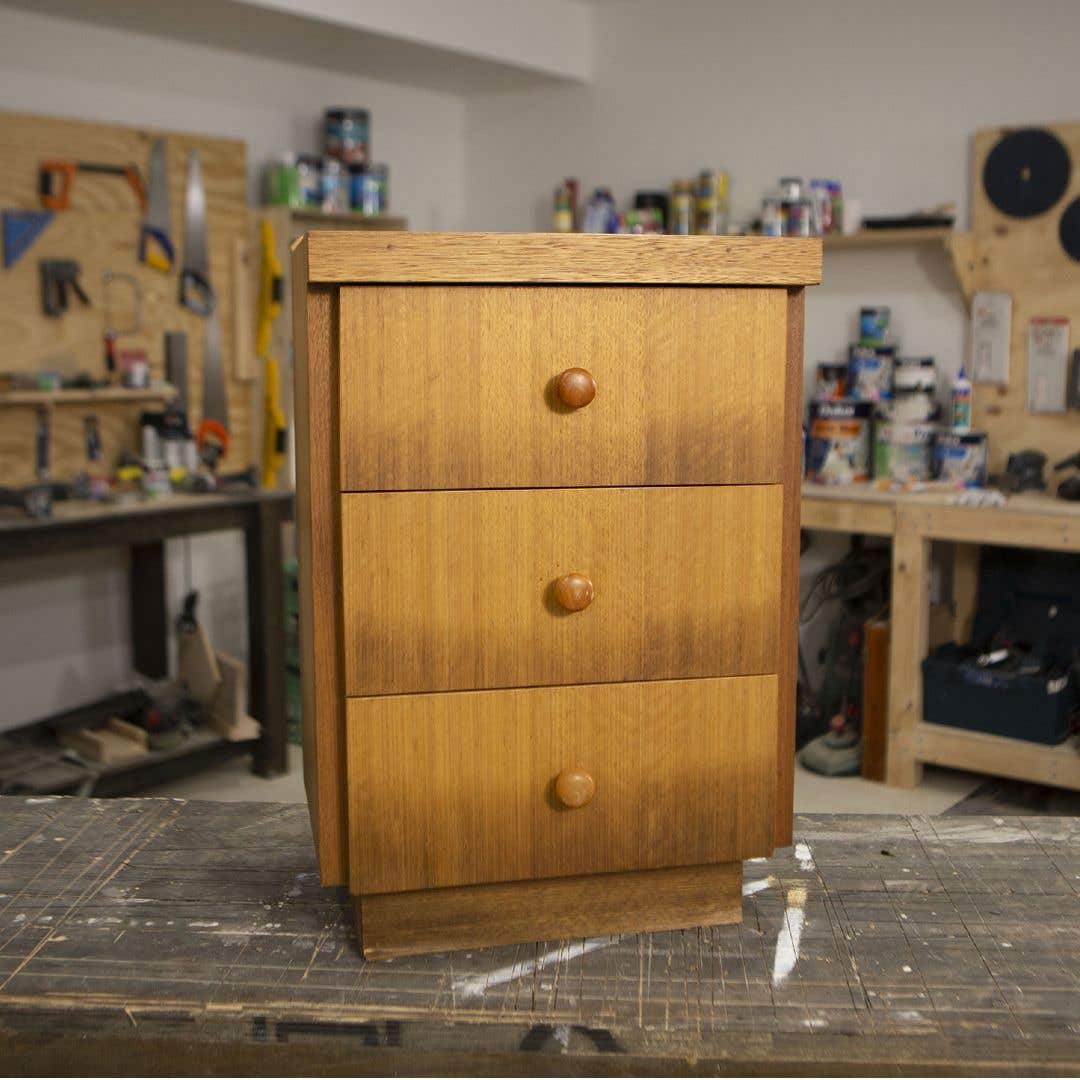
1. Clean the Table
Mix ½ cup of Selleys® Sugar Soap into ½ bucket (5 litres) of water. Use a soft cloth to clean the table from top to bottom with the sugar soap solution.
2. Smooth the Surface
Sand the table down and clean it again with Selleys® Sugar Soap to remove any dust.
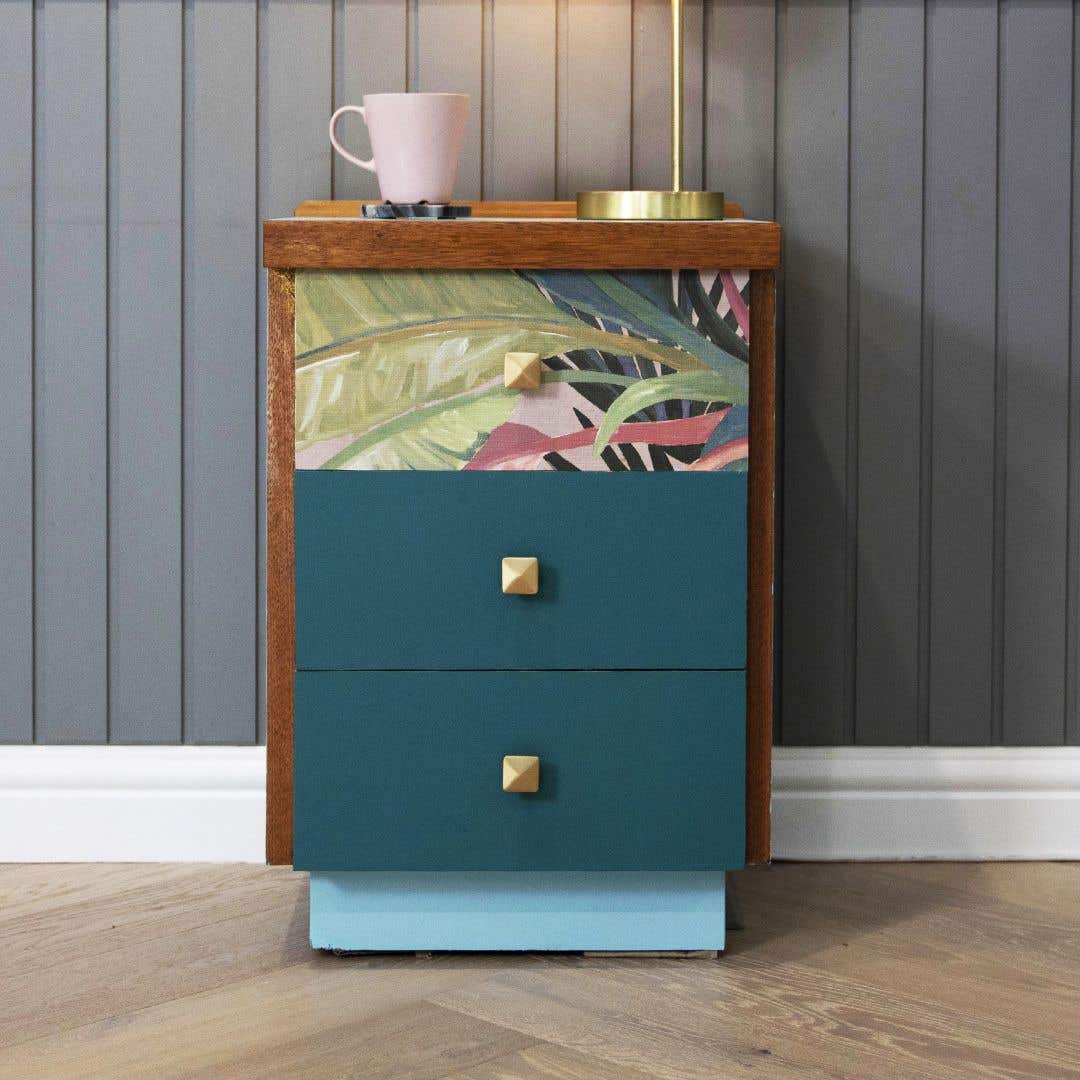
3. Prepare the Wallpaper
Measure and cut the wallpaper a bit oversized (2-3cm) to the front of the drawers leaving precut holes where the handles will go.
4. Apply the Wallpaper
Apply Selleys® Kwik Grip® Vertical both to the wallpaper and the front of the drawer and spread evenly. Keep surfaces apart until adhesive is almost dry – approximately 20 minutes. Then press surfaces firmly together. Secure bond by running a roller over the wallpaper. Wait 24 hours before using the bedside table.
5. Line the Drawers
Use the leftover wallpaper to line the drawers. Measure the inside of the drawers and cut to size. This time apply Selleys® Kwik Grip® Horizontal to both the inside of the drawer, and the wallpaper. Keep surfaces apart until adhesive is almost dry – approximately 20 minutes. Then work from one edge to press surfaces firmly together. Secure bond by running a roller over the wallpaper. Wait 24 hours before using the bedside table.
6. Add Handles
Add handles to the front of the bedside table and glue, with Selleys® Araldite® 5 Minute onto the into the precut holes of the wallpaper. Dispense equal parts of both liquids onto a clean disposable surface (e.g. a disposable plastic plate) and mix both parts together thoroughly. Apply mixed glue to the drawer and the handle, then bring together. If you need a stronger bond, use a clamp. Leave for 16 hours before using.
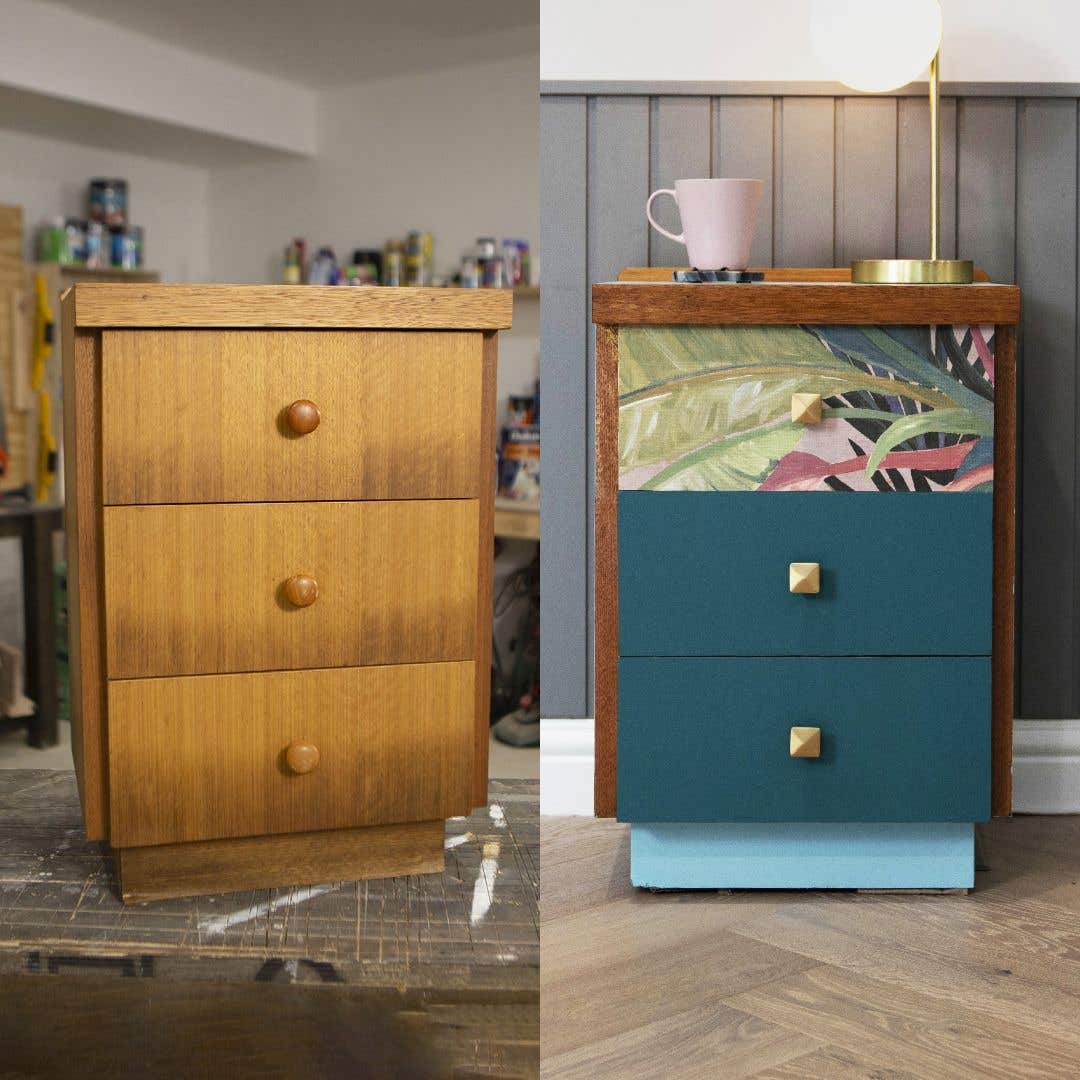
7. Finishing Touches
Paint it in the colour of your choice using Dulux® Wash&Wear® avoiding the areas where the vinyl is.
8. Appreciate Your Work
Lie in bed and admire your new bedside table!