- 24 July 2023
There's something rewarding about doing home improvement tasks yourself, especially something as foundational as bricklaying. Not only does it give you a sense of accomplishment, but it also provides you with practical skills that you can use in various situations around the house or garden. This detailed guide from Mitre 10 will take you through the process of laying bricks, from understanding the terms to finalising your project.
Tools Needed for Bricklaying
Before we dive into the steps of bricklaying, let's understand the tools you will need:
- Long Spirit Level
- Steel Measuring Tape
- Stringline and Bricklayer’s Pins
- Bricklaying Trowel (280 – 300mm blade)
- Mash Hammer and Brick Bolster
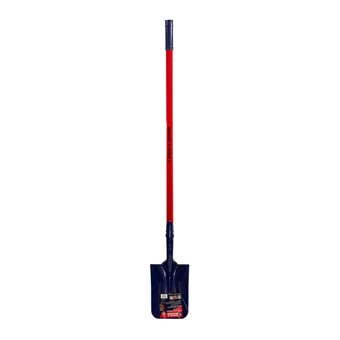
- Wheelbarrow
- Shovel and Bucket
- Strong Gloves
- Bricklayer’s Steel Scraper (for raked joins if required)
- Builders Square and Gauge Rod
In addition to these, you may also require a joint rule, a tool designed to shape and smooth the spaces between the bricks.
Step-by-Step Guide to Laying Bricks
Step 1: Get Approval
If you're planning to build a large structure, like a high brick wall, check with your local council for any regulations or permits required. Small structures like edging walls or barbecues usually don't need a permit. Consult your local council for advice on soil load-bearing capacities as well.
Step 2: Understanding Bricklaying Terms
Before you start laying bricks, it's important to understand some common bricklaying terms.
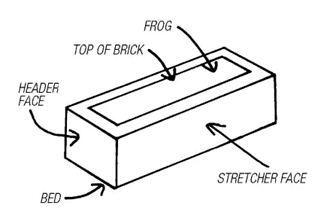
- Frog: Indentation on the top surface of a brick.
- Top of Brick: Uppermost visible surface of a brick.
- Stretcher Face: Long and narrow face of a brick in a wall.
- Header Face: Shorter and broader face of a brick in a wall.
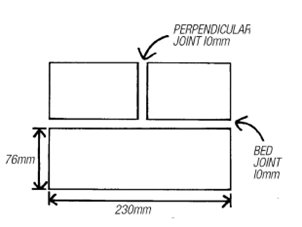
- Bed: Surface of the brick that contacts the mortar.
- Course: A single row of bricks.
- Joints: The mortar between bricks, usually 10mm thick.
- Buttering: Coating the end of a brick with mortar to form a vertical joint.
- Piers: Supporting columns built at regular intervals for added strength.
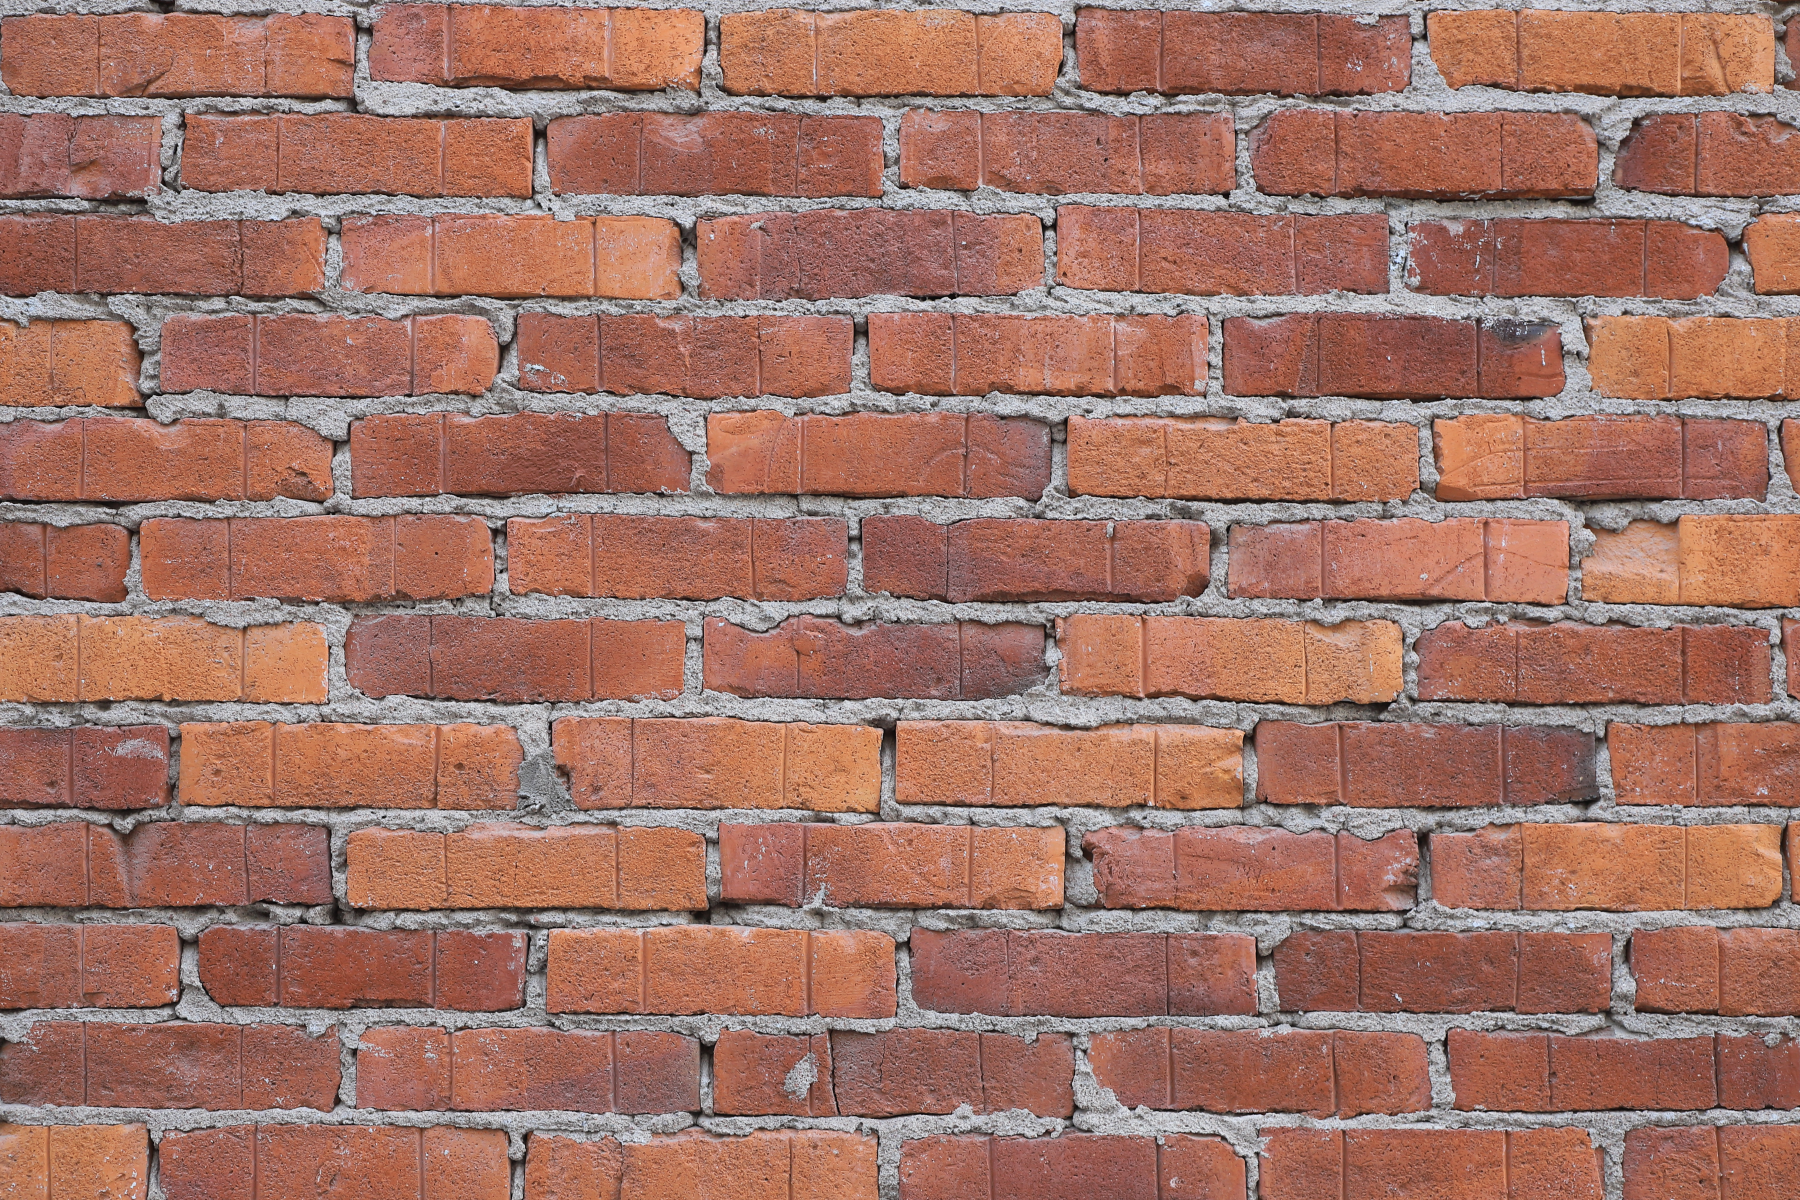
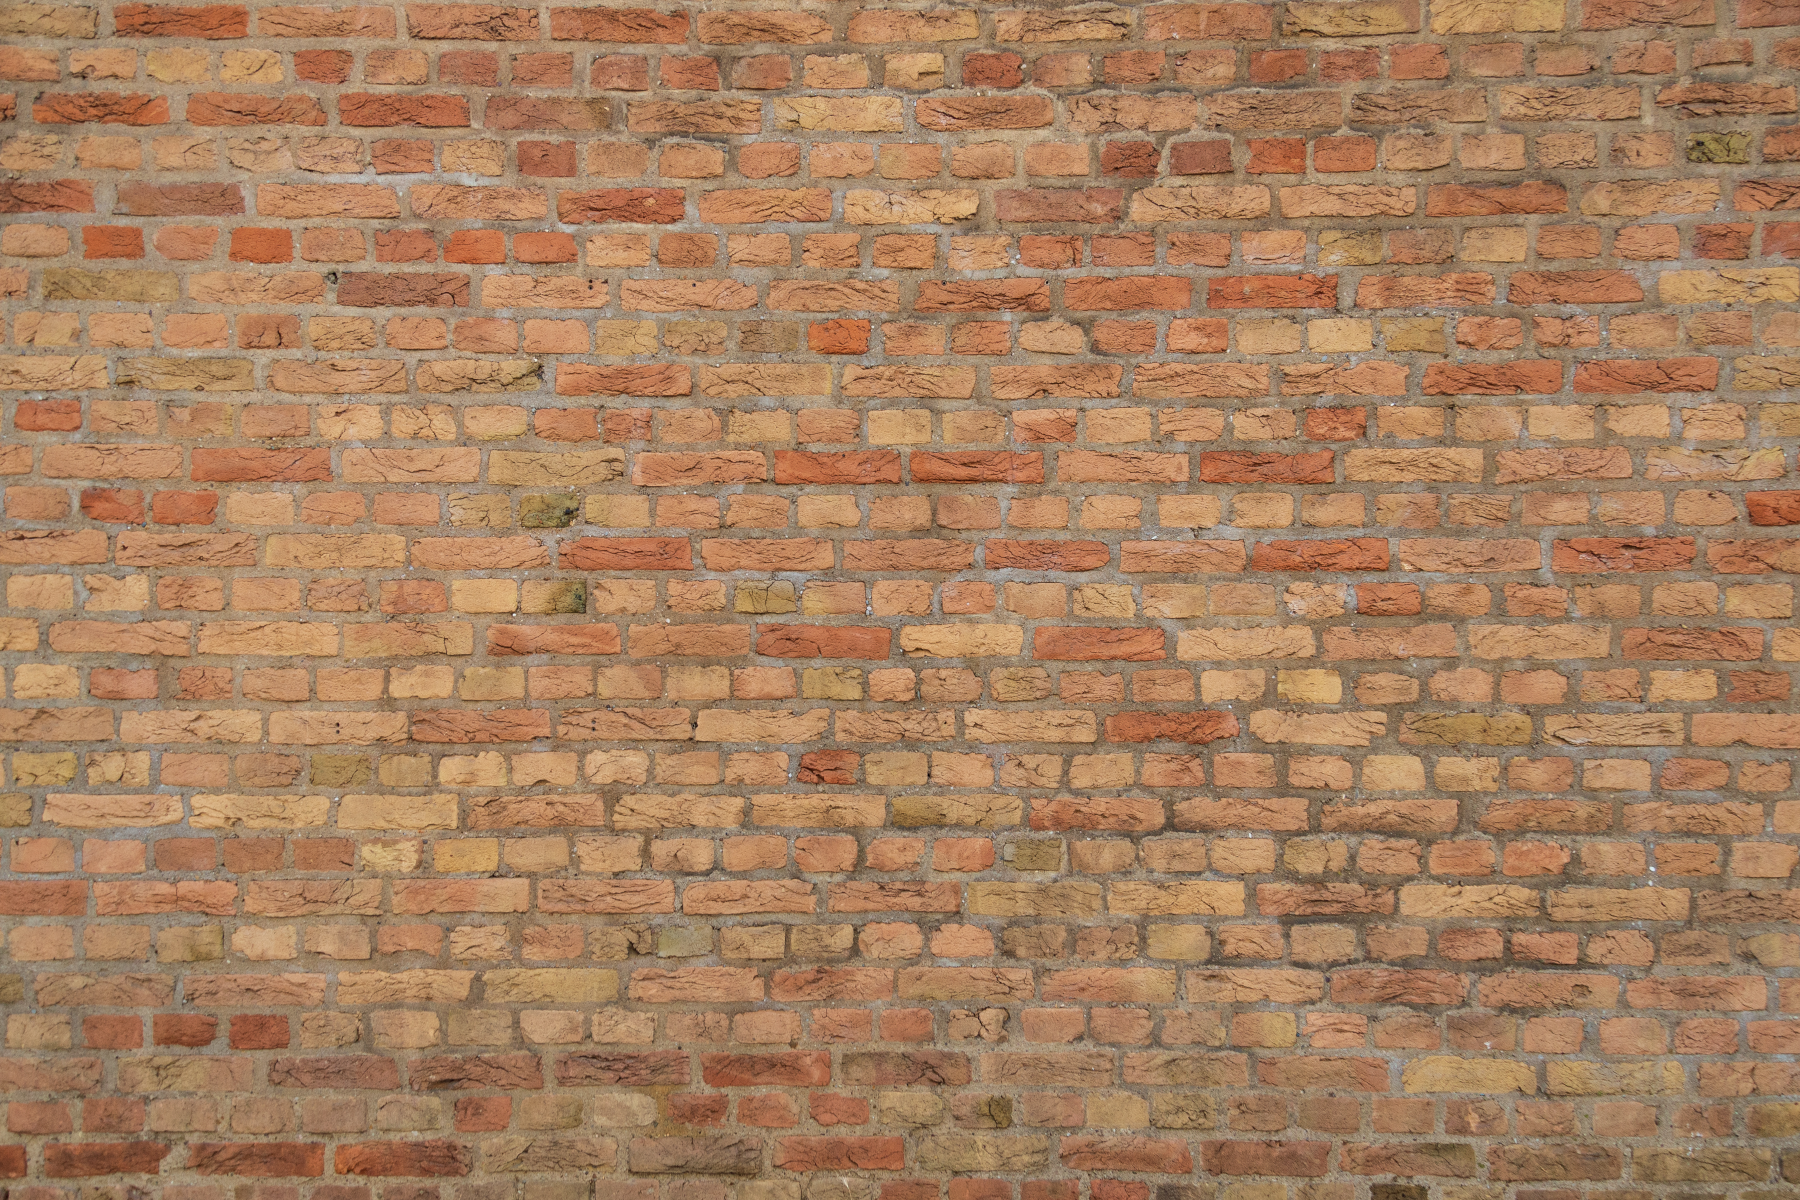
Step 3: Selecting the Bond Pattern
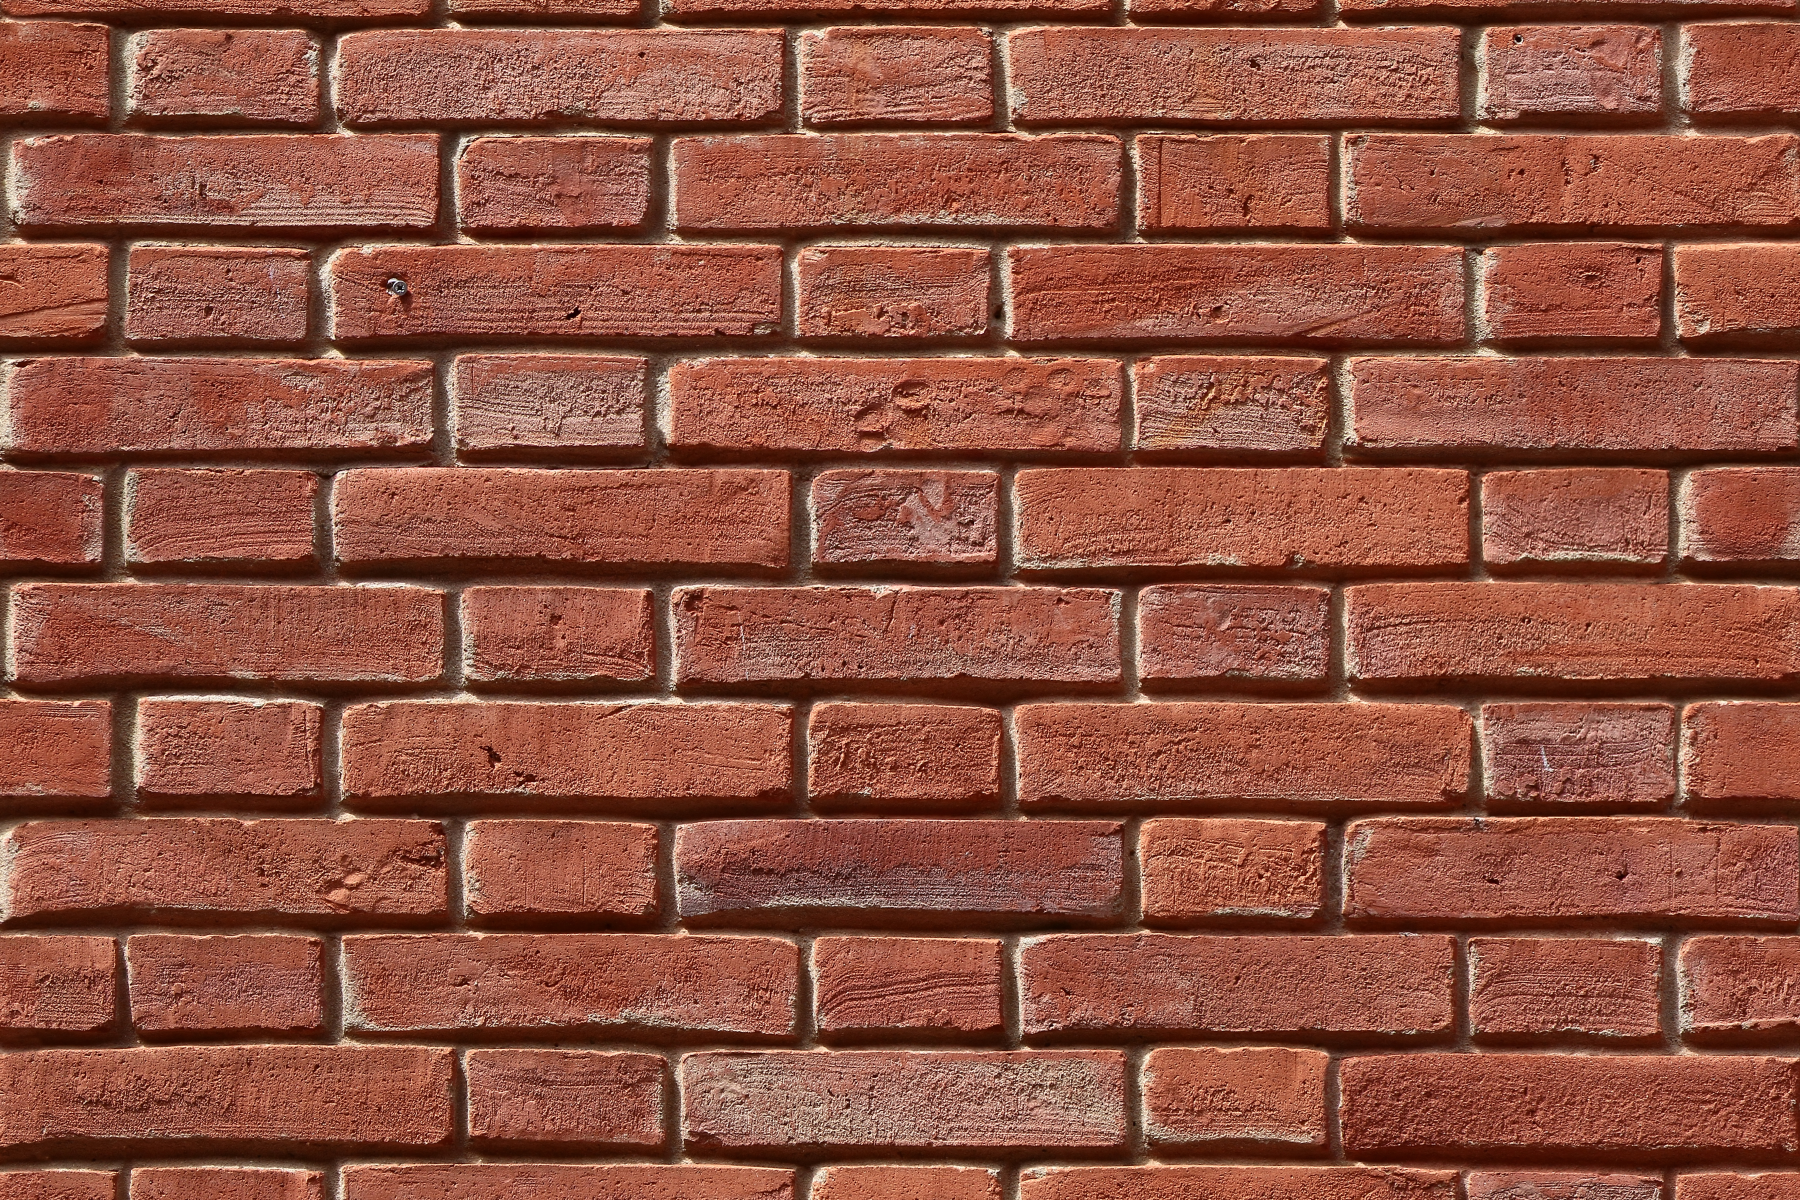
Bricks are laid in various patterns known as bonds. The bond you choose plays a critical role in the overall appearance and structural integrity of your project. Here are some of the most common bond patterns:
- Stretcher Bond: This is the simplest bond, where bricks overlap by half their length. It's commonly used for walls that are one brick thick.
- English Bond: Alternating courses of headers and stretchers make up this traditional bond. Headers are bricks placed at a right angle to the wall face, while stretchers are bricks placed lengthwise along the wall. This pattern is incredibly sturdy, making it suitable for load-bearing walls.
- Flemish Bond: This bond alternates headers and stretchers within the same course, providing an appealing visual pattern while maintaining strength.
- Stack Bond: All bricks are placed directly above one another, creating vertical columns. While visually appealing, this bond is less structurally sound and is mostly used for decorative or non-load bearing walls.

Step 4: Buying Materials
When buying bricks and mortar, it's important to consider a few things.
Brick
The standard brick size in Australia is 230mm (length) x 110mm (width) x 76mm (height), although sizes can vary depending on the type and style. When calculating the number of bricks required, remember to take into account the mortar joint, usually about 10mm thick, which effectively increases the size of each brick.
Mortar
As for the mortar, ready-mixed is suitable for smaller jobs. However, for larger jobs, you may want to consider mixing your own to have better control over the consistency. You should use 'fatty' sand for bricklaying as it adheres better to bricks, ensuring a stronger bond.
When estimating your material needs, aim for a little more than you think you'll need. It's always better to have some leftover materials than to run out in the middle of your project. A common rule of thumb is to add an extra 5% to your estimated total.
Also, consider the aesthetic aspect. Bricks come in a variety of colours, textures, and styles, so choose the one that best suits your project and blends well with the surrounding environment.
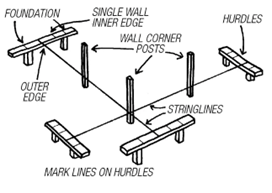
Step 5: Setting Out Reference Lines
Set out reference lines for the thickness of the foundation and walls using a stringline. Erect hurdles at the opposite ends of the walls and extend string lines between these points. This gives you an accurate line for digging the foundation and laying your bricks.
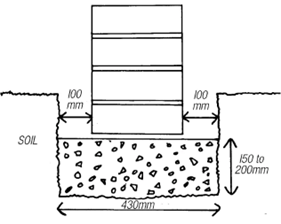
Step 6: Laying the Foundation
- Dig the foundation 200mm deeper than the ground level.
- Lay a 100mm thick layer of hardcore, tamp it down, and follow it with 50mm of damp sand.
- Tamp this layer down as well, then pour in the concrete until the foundation is 150mm below the damp proof course (DPC) level.
- Let it cure for at least 48 hours.
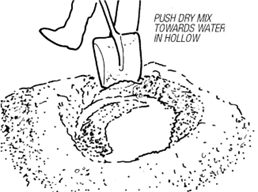
Step 7: Mortar Mixing and Usage
Mix the mortar with water until it's stiff enough to hold its shape without slumping. Remember, a soft mortar mix can lead to weak brickwork. Apply mortar to the foundation and start laying bricks from a corner, using a spirit level to keep things even. Clean off any excess mortar as you go.
Step 8: Preparing the Brick
Before laying each brick, you need to apply mortar to its end—this process is often referred to as 'buttering' the brick.
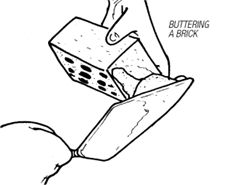
Using your trowel, scoop some mortar and apply it to the end (the 'header' face) of your brick, ensuring it's about 1cm thick. It might take a bit of practice, but this step is crucial in forming a sturdy bond between bricks.
Step 9: Laying the Brick
Now, take your buttered brick and place it in position on the mortar bed, aligning it properly with your string line. Then, tap it gently using the butt of your trowel until it's set in place and level with the other bricks. Any excess mortar that comes out should be removed with your trowel.
During this step, you might encounter a situation where a full brick can't fit. This is where brick cutting comes in. Using a bolster and a club hammer, you can cut the brick to the required size. Safety glasses are a must to protect your eyes from any flying debris.

Step 10: Building a Strong Bond and Checking Your Work
In bricklaying, continuity is important to ensure a strong bond. This is where 'racking back' comes in. When you finish for the day, instead of ending with a complete course, you leave the wall stepped. This helps tie in new work with the old when you resume, ensuring the structural integrity of the wall.

As you progress, it's crucial to check your work regularly. Using your spirit level, make sure your courses are level and the bricks are plumb. Also, ensure your vertical joints or 'perpends' are lined up. This will contribute to both the aesthetics and strength of your wall.
Step 11: Finishing the Mortar Joints
Once the mortar begins to dry and becomes thumbprint hard, it's time to finish off the mortar joints. This is where the jointer tool comes in. Run it along the joints, pressing in the mortar and smoothing it out for a neat finish. It also helps seal the joints and make them weatherproof.
Mastering the art of bricklaying takes time and practice, but with this comprehensive guide, you're well on your way to becoming proficient. Remember, if you're unsure about anything, it's best to seek professional advice to ensure a safe and successful project. Good luck and happy building!