


- 13 September 2021
Tile your own floors
Tiled floors made 10/10 times easier – with a little help from Mitre 10.
When you’re planning some home renovations or you’re simply updating, consider tiling your floors. A tiled floor is attractive, hard-wearing and easy to clean. And today’s choice of tiles means you’ll easily find the type you want, in the colour or pattern to suit your decor. If you thought that tiling floors was a difficult job only for a tradesman, then we’ve good news for you. Provided the surface is suitable and you prepare it correctly, laying tiles requires no special skill, especially with modern adhesives. Not only do you save heaps, you also get the satisfaction of seeing a job well done and one which you did yourself. And with this step-by-step guide – and a little help from Mitre 10 – you can’t go wrong.
Which type of tile?
- Ceramic Tiles are ideal for kitchens,
bathrooms and halls, but their hard-wearing
and decorative surface is suitable for any
room. They come both glazed and unglazed
in a wide range of colours and patterns.
You should seal unglazed tiles with a ceramic
tile sealer before walking on them. - Vinyl Tiles are latex backed and comfortable
to walk on. They are supple and are easy to
handle and lay. They come in many colours
and designs, some imitating other materials
such as stone and timber. You can use them
in any room, but they are especially suited
to kitchens and bathrooms. Vinyl coated
tiles are also available. They offer a cheaper
alternative, but are not as durable.
- Cork Tiles provide any room with a floor
surface that’s warm, wears well and is quiet
and comfortable to walk on. Most need to
be sealed with a polyurethane coating after
laying for protection. Check your Mitre I0
specialist for the correct type.
Tools for the Job
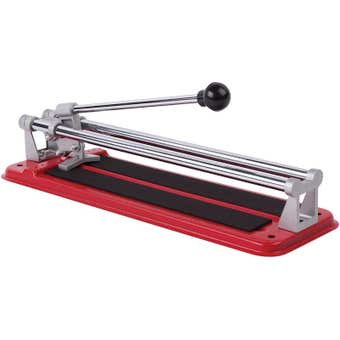
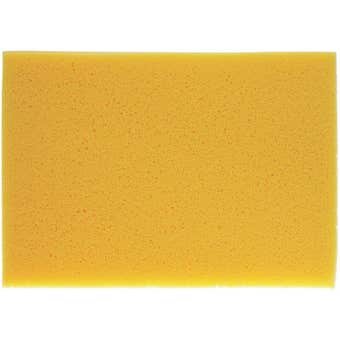
Ceramic Tiles:
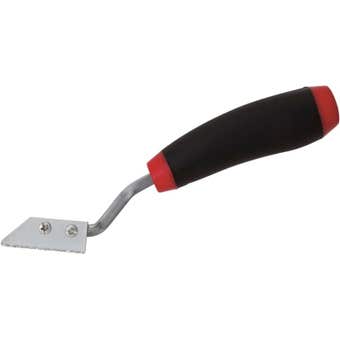
Tape Measure, Stringline, Tile Cutters, Tile Nibblers, Tile File, Notched Adhesive Spreader, Sponge or Squeegee.
Vinyl and Cork Tiles:
Tape Measure, Stringline, Utility Knife, Straight-edge, Notched Adhesive Spreader.
Other essential tools
Depending on the surface you’re laying your tiles on. If it’s a timber floor, you’ll also need a saw, hammer and nail punch to first cover the floor with hardboard sheeting. If concrete, you may need a chisel to clean out small depressions and a trowel for levelling with mortar.
Step I: Planning
It’s well worth measuring and planning your layout on paper first, especially if you intend to use an intricate design. If the room is an irregular shape, divide it into rectangles and measure each one separately. Then make a scale drawing on graph paper. This will help you set out an attractive design and allow you to work out the number of tiles you need. Ceramic tiles are commonly 150 x 150mm square or 100 x 200mm oblong, but interlocking circular, hexagonal and Provencale-shaped tiles are also available. They can be bought singly or by the square metre. Vinyl and Cork tiles are 300 x 300mm square and are usually sold in packs. If you’re not planning a design, use this chart as a quick guide to the number of tiles you’ll need.

Step 2: Preparing the floor surface
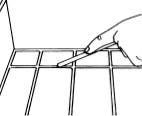
The surface should be dry, flat, stable and free from grease, dirt and unsound material. If you have a concrete floor which is flat and level, go ahead and lay your tiles without further ado. But if there are small cracks or holes, first chisel out any loose material, sweep clean and fill using a pre-mixed cement. An uneven floor can be levelled using a self-levelling compound. Timber floors are not stable enough to tile directly over. An underlay must first be laid over it for best results. Hardboard underlay sheets such as masonite are suitable only for cork or vinyl. Ceramic tile underlay must be used under ceramic tiles. First punch any protruding nails in the floor below the surface. Begin laying the board in one corner with the smooth side facing up. Fix with 25mm underlay nails at I50mm intervals around the edges and 225mm apart across the middle of the sheets. Nail the first sheet and work along the wall. When you come to the end of a row, cut the sheet to fit. Use the off-cut to start the next row so the joins are staggered (Fig. I). This will prevent tiles from being disturbed if there’s any floor movement.
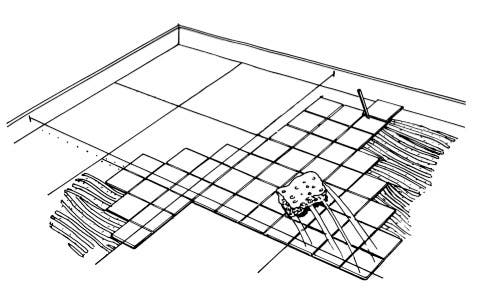
Step 3: Finding the starting point
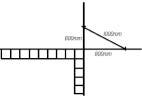
Tiles look best centred in the middle of the room with any narrow tiles at the edges. So your first task is to find the centre of the floor. If you simply begin from a corner you may end up with whole tiles along one side and narrow tiles along the other. So instead, measure along one wall and mark the centre at floor level. Do the same along the opposite wall. Now stretch stringline from one centre mark to the other. Then repeat the process for the other two walls. The two lines will meet at the exact centre of your floor. It’s important that these two lines are square to each other. Measure 600mm from the intersecting point along one line, then 800mm along the other. Now measure diagonally to these two points. If the measurement reads Im then the lines are square. If not, adjust one of the lines and repeat the measuring process until the diagonal of 600:800 equals Im. Next, lay a row of loose tiles along both lines starting from your centre point (Fig. 2). If you find that there is less than one half of one tile between the wall and the last full tile, adjust the lines to set a new centre so that tiles are equal at both ends when cut. End tiles should be as close as possible to half the tile size when cut.
Step 5: Laying your tiles
Except for self-adhesive vinyl tiles, all floor tiles are laid in pretty much the same way. Begin by laying whole tiles, working from the centre outwards. Spread a bed of adhesive with a notched adhesive spreader according to the maker’s instructions (Fig. 3). Spread only enough adhesive to cover an area of about one square metre – any bigger and the adhesive may dry out before you reach the end.
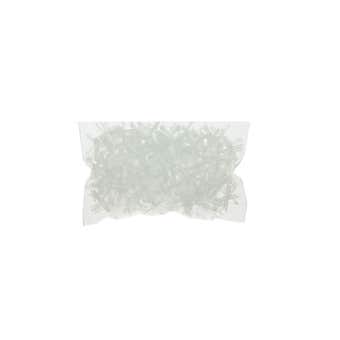
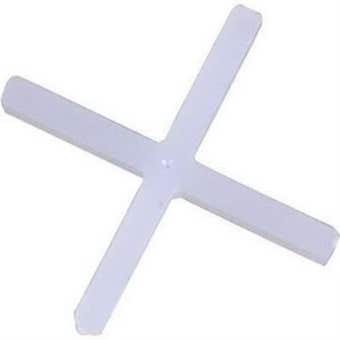
Ceramic. Press the first tile into position, then twist it slightly to firmly bed it in the adhesive. Place the second tile alongside with the same gentle twisting motion, using a plastic tile spacer between them to obtain evenly spaced gaps. Continue until you’ve reached the edge of the adhesive, then spread another layer over a further square metre.
Vinyl. Place each tile directly into position without sliding. Butt up the edges closely. Firmly press down all over each tile with the palm of your hand to ensure good even adhesion. If using self-adhesive tiles, simply pull off the backing paper and press into place. Try to align tiles correctly the first time. If you do make a mistake, immediately lift the tile and re-stick it correctly. If you attempt to lift it later, it will probably tear.
Cork tiles should be positioned with a slight sliding action without forcing them tightly together. Avoid trimming the edges if they seem a bit out of square. It’s easier to fill any tapering joints with woodworker’s putty coloured to match the tiles.

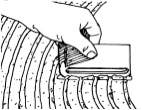
Step 6: Fitting border tiles
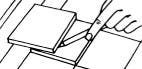
When all the tiles are in position, start cutting tiles to size. Place the tile to be cut exactly on top of the last whole tile in a particular row. Place a second tile over it, this time butted up against the wall or skirting board (Fig. 4) (for ceramic tiles, place your tile spacer against the wall to allow for grouting). Use the edge of the top tile to make a line on the tile to be cut. For ceramic tiles, score across the line with a scribing tile cutter, then snap the tile with a heavy duty tile cutter for a clean break (Fig. 5). Comb adhesive on the back of the cut tile and press it into position hard against the wall or skirting. To cut an L-shape, score the surface carefully and nibble away the waste with tile pincers (Fig. 6). Vinyl and Cork tiles are much easier to cut. First, use a sharp utility knife to score through the surface. Then carefully bend back the tile – it should snap cleanly along the score line.

Step 7: Finishing off
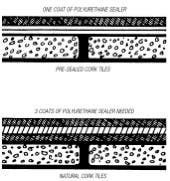
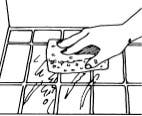
With vinyl tiles, you need do nothing further. But ceramic tiles will need to be grouted and cork tiles sealed. In both cases, allow 24 hours for the adhesive to dry. When buying grouting, ensure that the colour you choose is going to enhance the overall appearance of the job. Mix it according to the manufacturer’s instructions. Make up only a small amount at a time and work in areas of one square metre. Use a sponge or rubber squeegee to force the grout into all gaps, wiping off the excess with a damp sponge as you work (Fig. 7). It’s best to use a piece of thin dowel with a rounded end to smooth the joints (Fig. 8). If you use your finger, make sure you wear rubber gloves – grout can irritate the skin. Leave it to dry for the manufacturer’s recommended time, then polish with a clean, dry cloth. If you’ve chosen cork tiles with a factory-applied sealer coat on the surface, you will only need to apply one coat of a polyurethane sealer or wax polish. But if it’s natural cork, it needs three coats. First, lightly sand with a power sander to ensure the surface and joins are smooth. Dust carefully – you can use a slightly damp cloth but don’t saturate the tiles. Leave them to dry, then seal as per manufacturer’s instructions with brush, roller or mop. Leave each coat to dry for at least 24 hours before the next